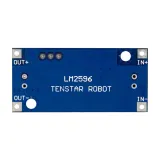
SKU: OT2073-B48 Artikelnummer: AA104 EAN: 4772496877447

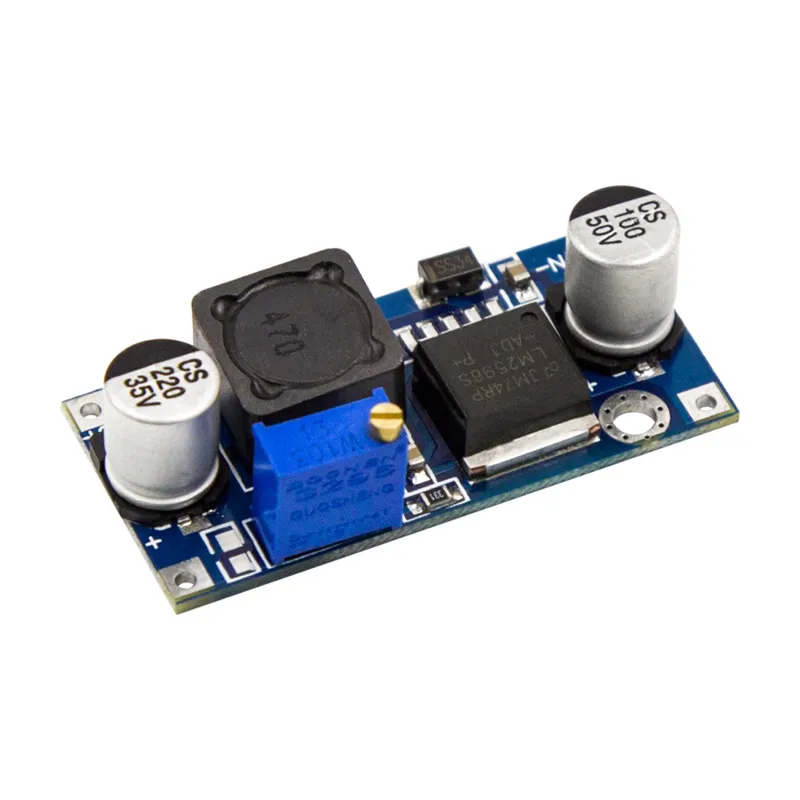
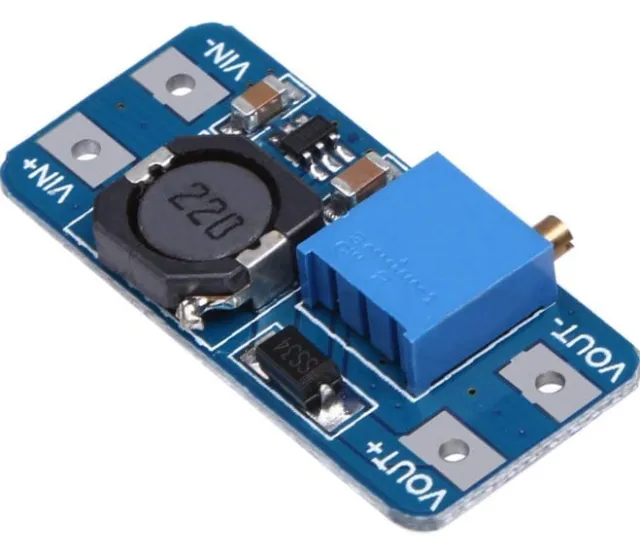
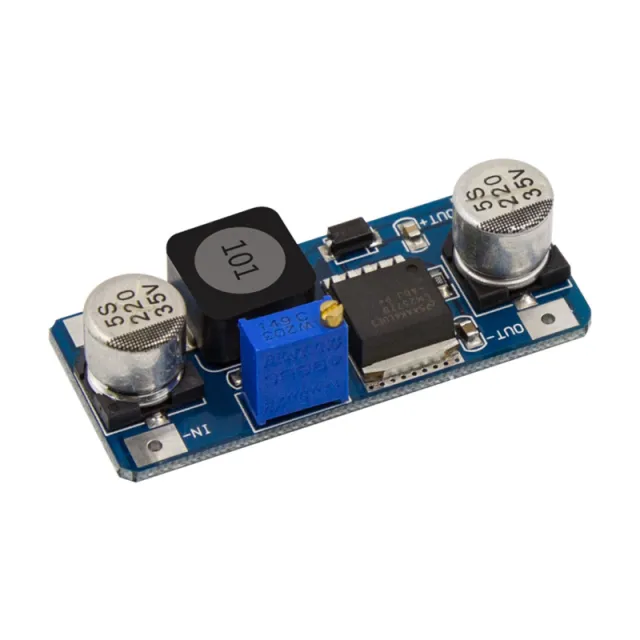
Med LM2596 step-down-modulen kan du omvandla en DC-ingångsspänning mellan 3V och 40V till en justerbar DC-utgångsspänning på 1.5V till 35V. LM2596-modulen stabiliserar utgångsspänningen och förblir stabil så länge ingångsspänningen inte är lägre än 10% över utgångsspänningen. Detta kan vara praktiskt till exempel vid matning av elektroniska apparater som arbetar med en lägre spänning än standardmatningsspänningen. LM2596-modulen är utrustad med en potentiometer som gör att utgångsspänningen enkelt kan justeras.
Modulen har en utström på maximalt 3A med en verkningsgrad på upp till 92%. LM2596 har inbyggda skyddsfunktioner (såsom mot överhettning, överström och kortslutning) för att säkerställa att din utrustning matas säkert.
Tekniska specifikationer:
- Ingångsspänning: 3V - 40V DC
- Utgångsspänning: 1.5V - 35V DC (justerbar)
- Maximal utström: 3A
- Verkningsgrad: upp till 92%
- Inbyggda skyddsfunktioner (överhettning, överström, kortslutning)
- Mått: 43mm x 21mm x 14mm
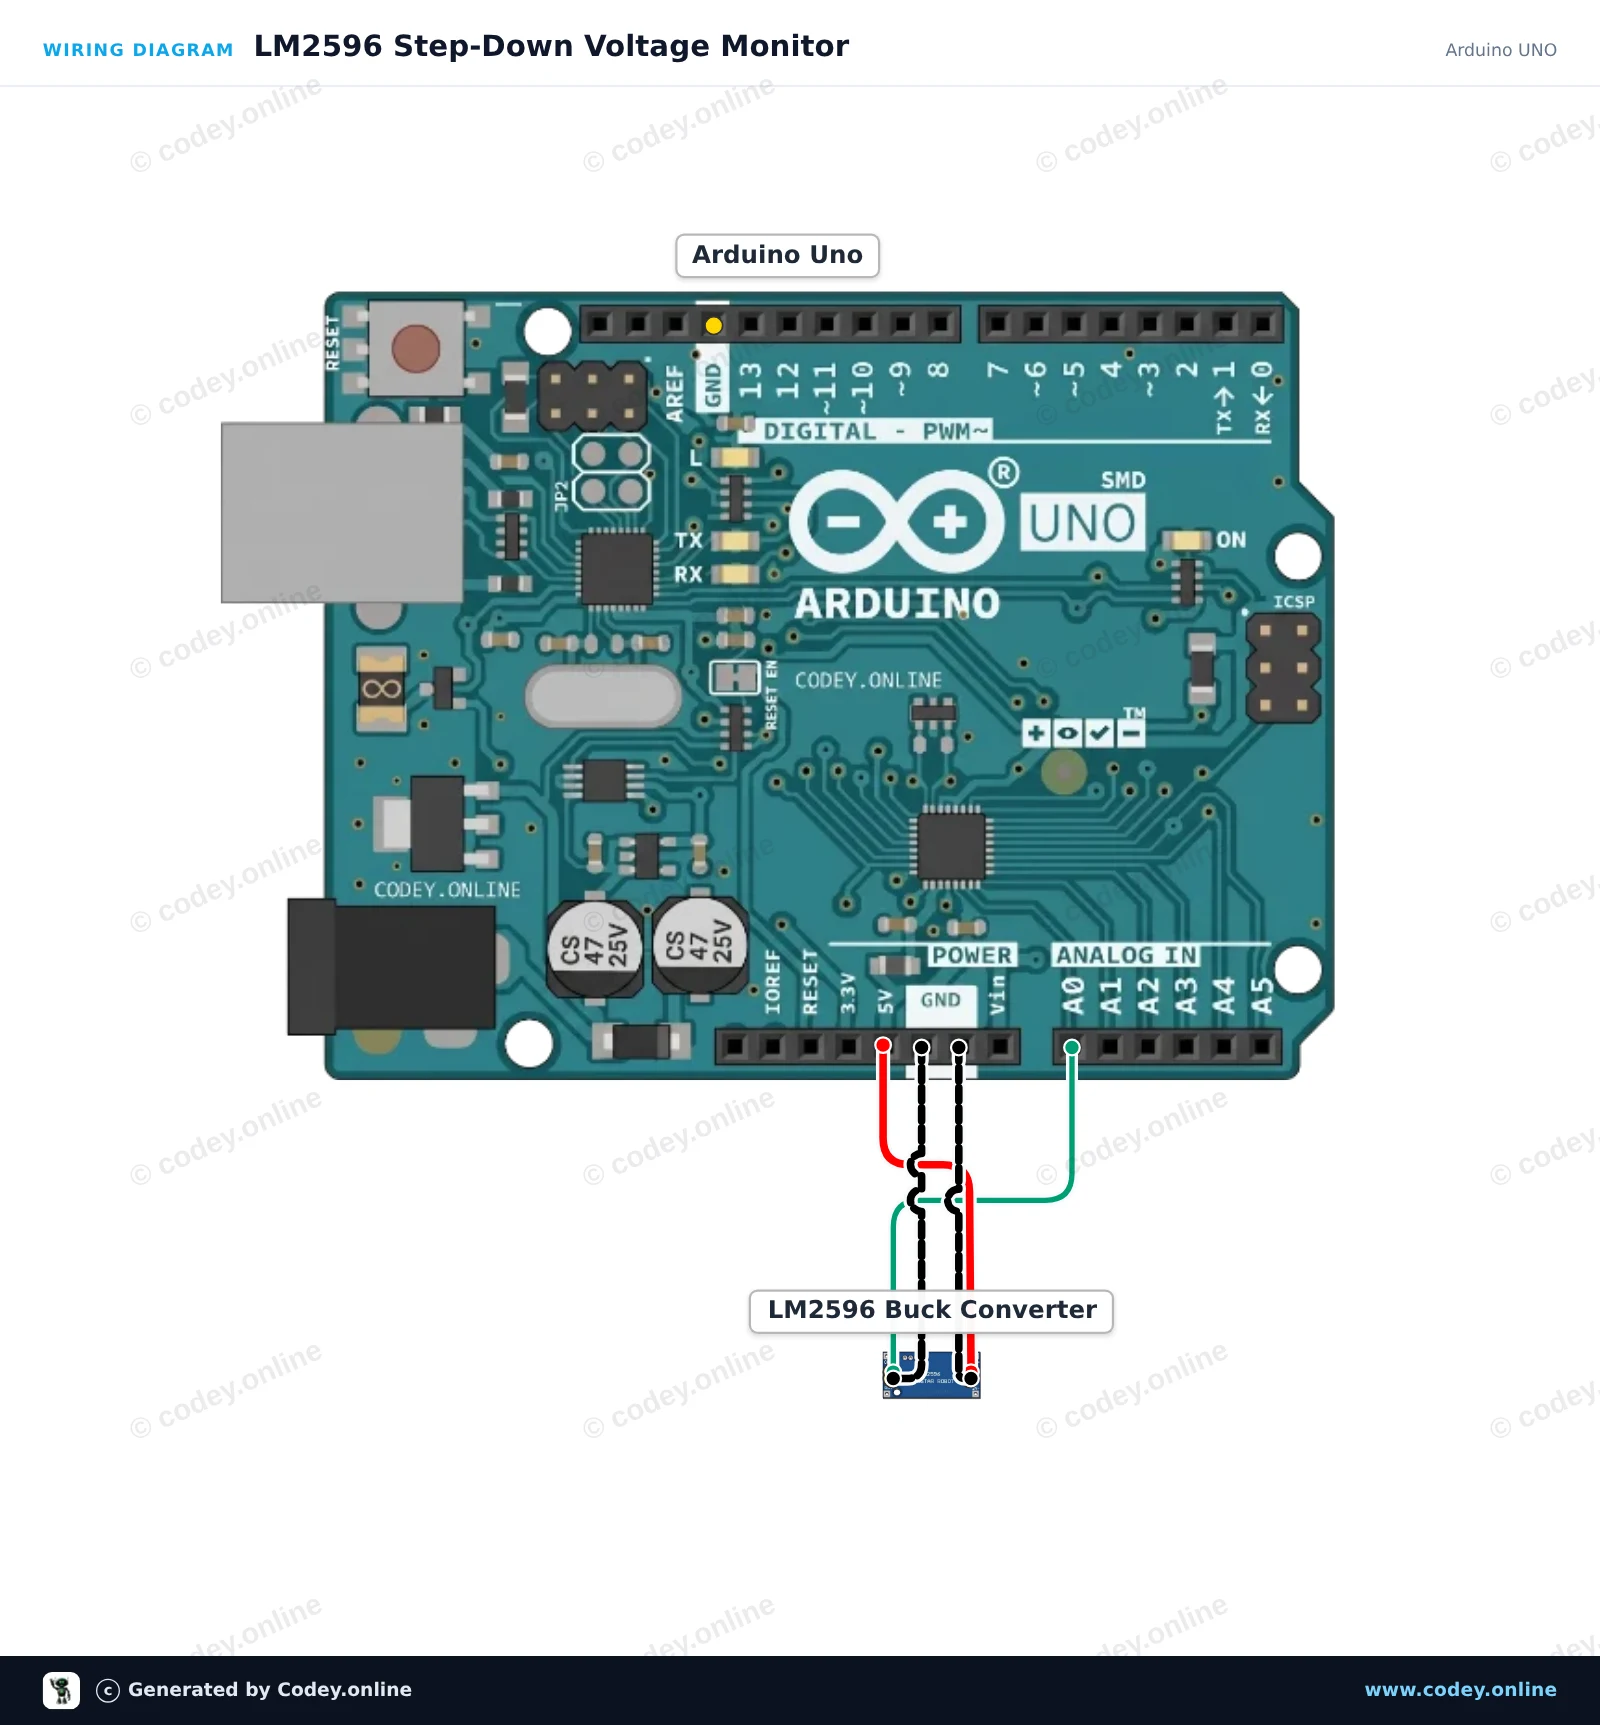
Så här kopplar du Justerbar Step-down Module 3-40VDC till 1.5-35VDC LM2596 till en Arduino UNO eller ESP32, med ett exempelsketch som du kan ladda upp direkt.
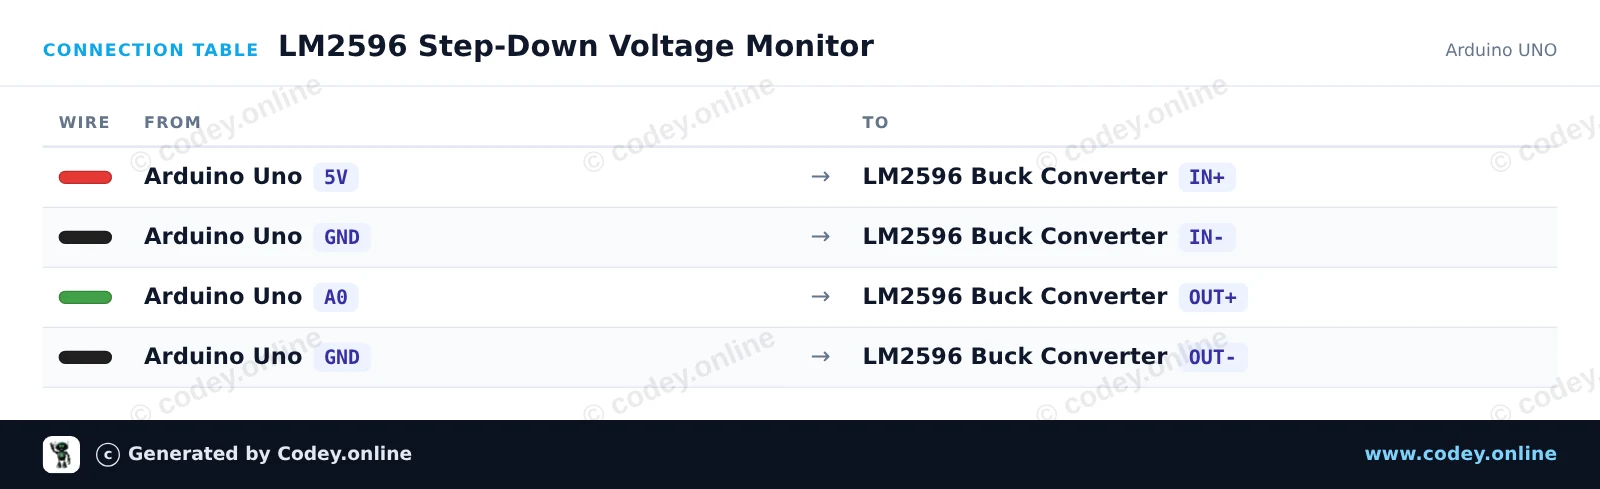
This project monitors the output voltage of the LM2596 adjustable step-down converter using analog pin A0. Power the module from the Arduino 5V/VIN pin and turn the onboard potentiometer to watch the measured voltage update in the Serial Monitor (ensure output voltage does not exceed 5V).
/*
 * ==================================================================
 *  Generated by Codey.online  —  https://www.codey.online
 * ==================================================================
 *  Project   : LM2596 Step-Down Voltage Monitor
 *  Board     : Arduino UNO (arduino:avr:uno)
 *  Parts     : Adjustable Step-down Module 3-40VDC 1.5-35VDC LM2596
 *  Libraries : none (built-in)
 *
 *  Codey Online is an AI-powered browser IDE for Arduino and ESP32.
 *  Describe your project and Codey writes the code, draws the wiring
 *  diagram and uploads it to your board, straight from the browser.
 *  This code is free to use, modify and share, without warranty.
 * ==================================================================
 */

// LM2596 Buck Converter Voltage Monitor
// Reads the regulated output on analog pin A0.
// Note: Keep the output voltage at or below 5.0V to protect the analog pin.

const int sensePin = A0;

void setup() {
  Serial.begin(115200);
  while (!Serial) {
    ; // Wait for Serial Monitor
  }
  Serial.println(F("LM2596 Step-Down Voltage Monitor Initialized"));
  Serial.println(F("Adjust the trimmer potentiometer on the module."));
}

void loop() {
  int rawValue = analogRead(sensePin);
  float voltage = rawValue * (5.0 / 1023.0);

  Serial.print(F("ADC Value: "));
  Serial.print(rawValue);
  Serial.print(F(" | Output Voltage: "));
  Serial.print(voltage, 2);
  Serial.println(F(" V"));

  delay(500);
}Wiring diagram and example code generated by Codey.online — https://www.codey.online
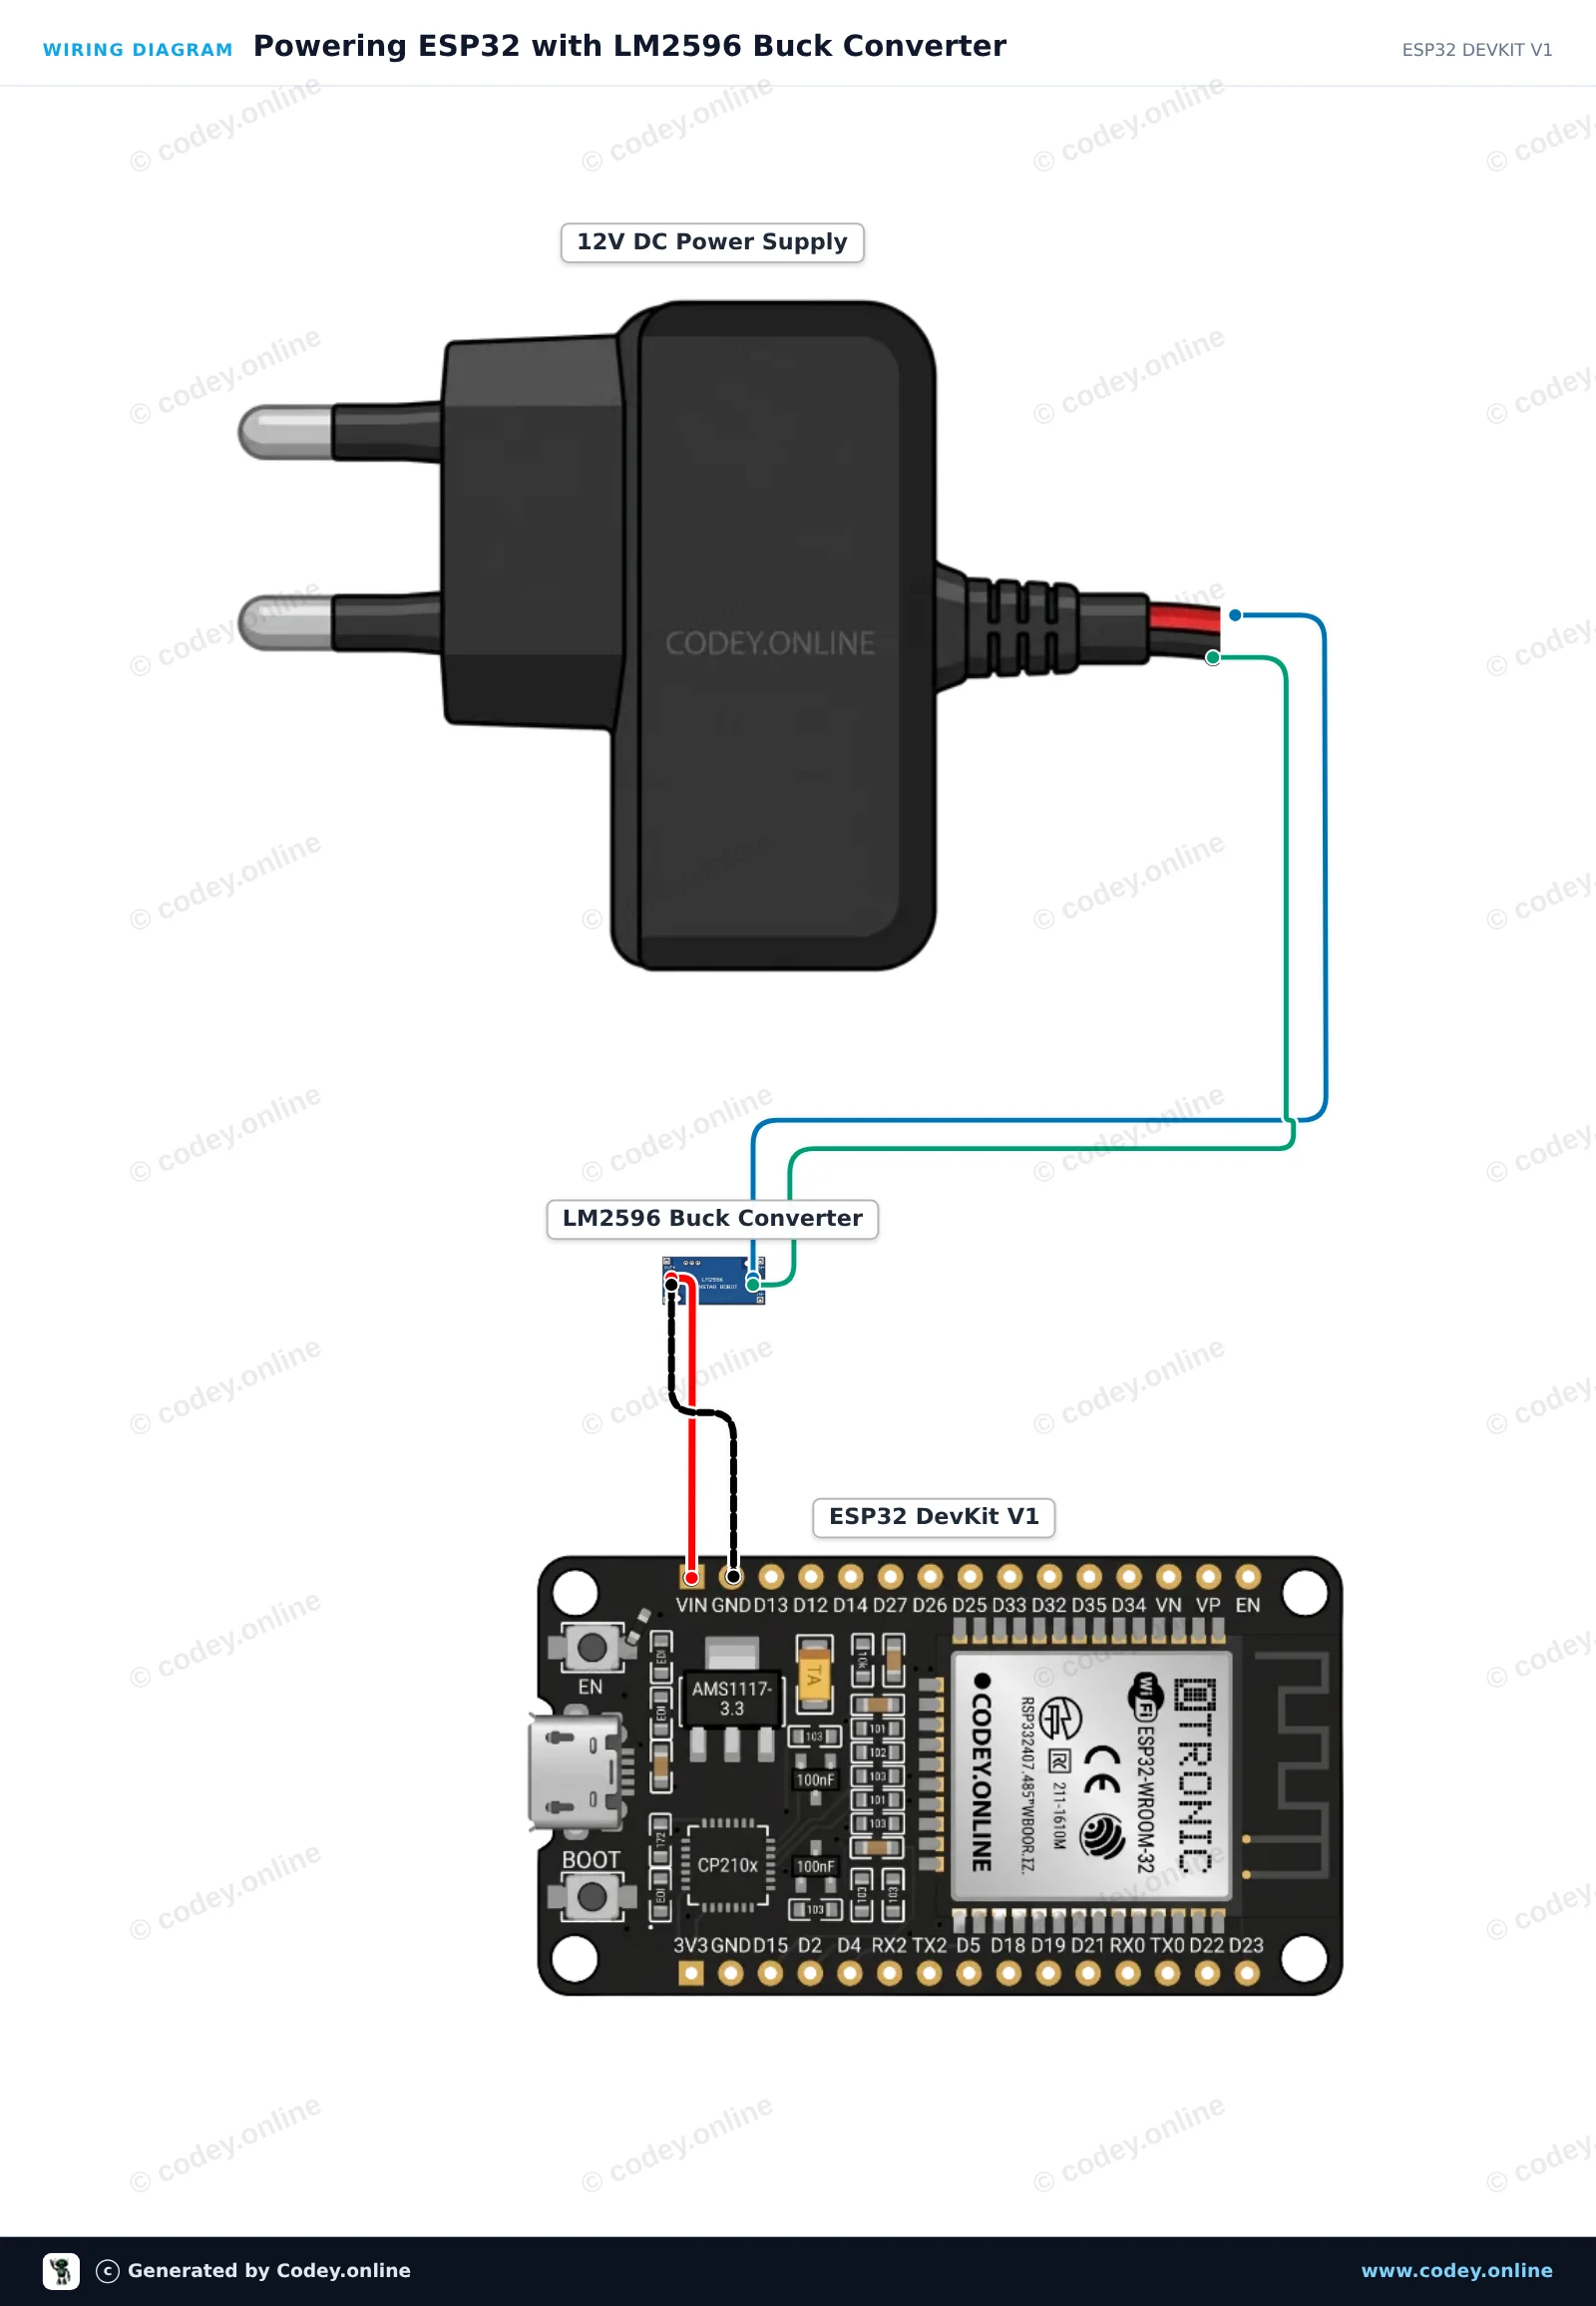
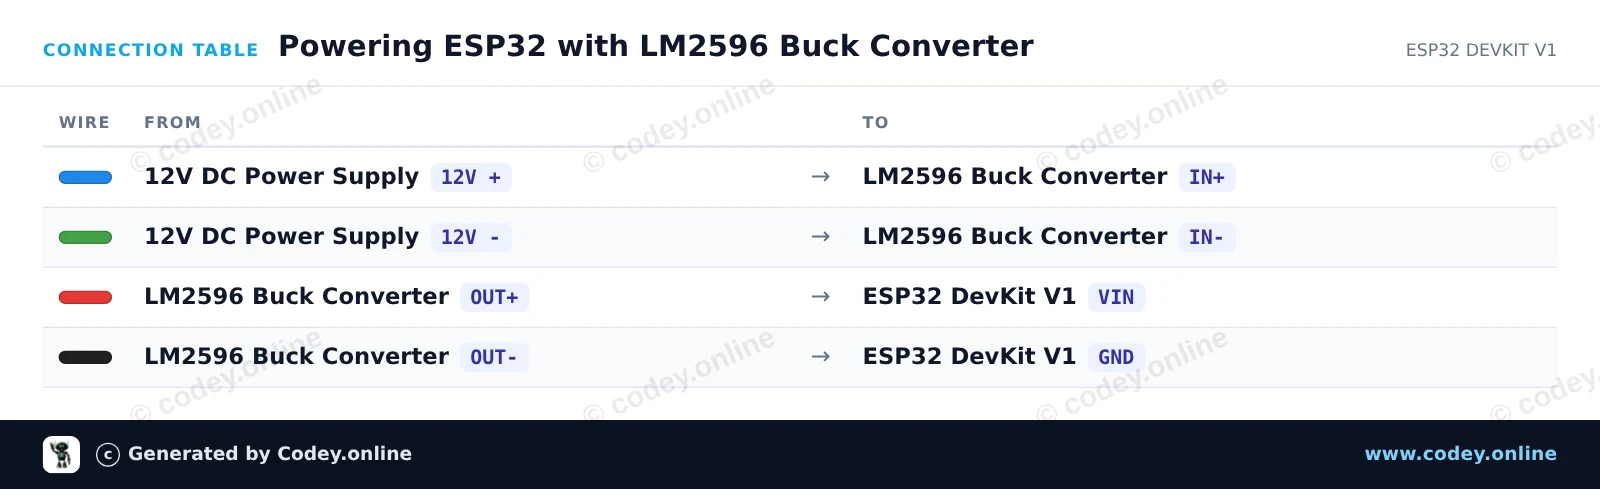
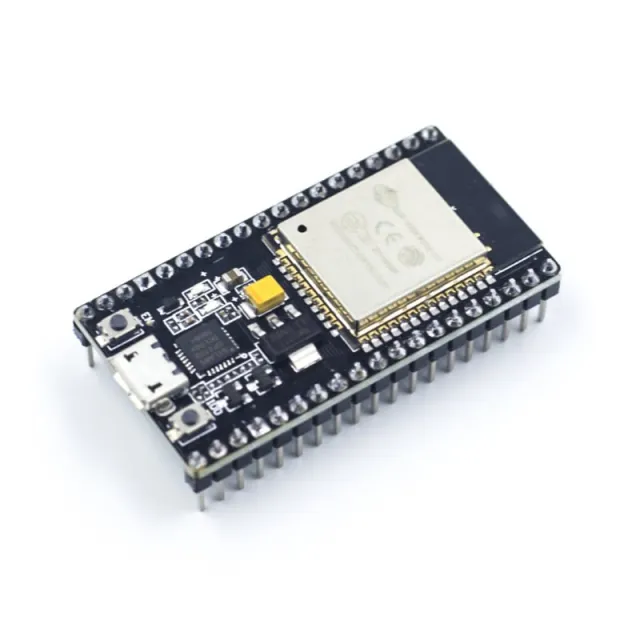
This setup uses the LM2596 step-down module to regulate a 12V DC power source down to 5V to power the ESP32 via its VIN pin. Before connecting the output to the ESP32, use a multimeter and turn the onboard trimmer potentiometer until the output measures exactly 5.0V. The ESP32 blinks its onboard status LED and reports uptime over Serial to confirm stable operation.
/*
 * ==================================================================
 *  Generated by Codey.online  —  https://www.codey.online
 * ==================================================================
 *  Project   : Powering ESP32 with LM2596 Buck Converter
 *  Board     : ESP32 DEVKIT V1 (esp32:esp32:esp32doit-devkit-v1)
 *  Parts     : Adjustable Step-down Module 3-40VDC 1.5-35VDC LM2596
 *  Libraries : none (built-in)
 *
 *  Codey Online is an AI-powered browser IDE for Arduino and ESP32.
 *  Describe your project and Codey writes the code, draws the wiring
 *  diagram and uploads it to your board, straight from the browser.
 *  This code is free to use, modify and share, without warranty.
 * ==================================================================
 */

// Onboard LED on ESP32 DevKit V1 is on GPIO 2
const int LED_PIN = 2;

void setup() {
  Serial.begin(115200);
  pinMode(LED_PIN, OUTPUT);

  Serial.println("LM2596 Step-Down Module ESP32 Power Demo");
}

void loop() {
  digitalWrite(LED_PIN, HIGH);
  Serial.print("ESP32 running stably on buck converter power. Uptime: ");
  Serial.print(millis() / 1000);
  Serial.println(" s");
  delay(1000);

  digitalWrite(LED_PIN, LOW);
  delay(1000);
}Wiring diagram and example code generated by Codey.online — https://www.codey.online





 English
  Nederlands
  Frans
Frans  Deutsch
  Italiano
  Español
  Suomi
Suomi  Polski
  Dansk
Dansk  Ελληνικά
  Български
  Čeština
  Hrvatski
  Aileen