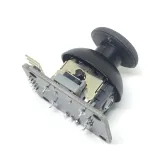
SKU: OT620-B36 Artikelnummer: YQ939 EAN: 8720828223031

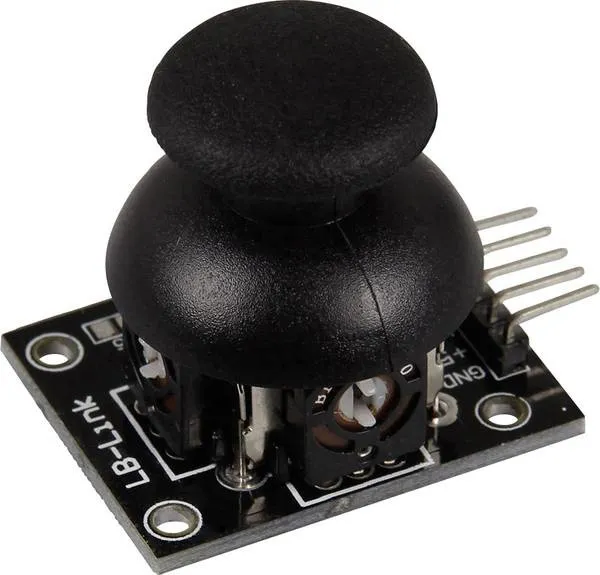
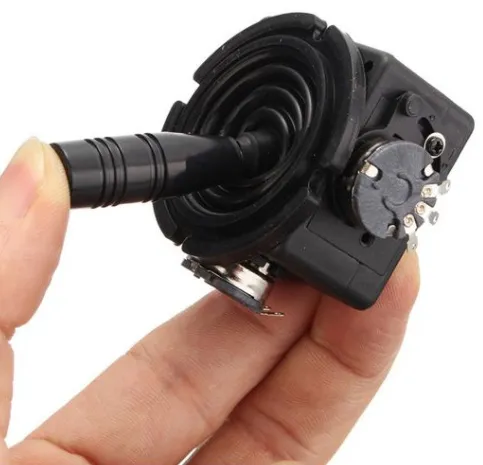
Med detta kort kan joystickens X- och Y-position visas som analog spänning på utgångsstiften. Lämplig för bl.a. Arduino-, Raspberry Pi-, ESP8266- eller ESP32-projekt.
se här kopplingsschemat och exempel-koden >>>
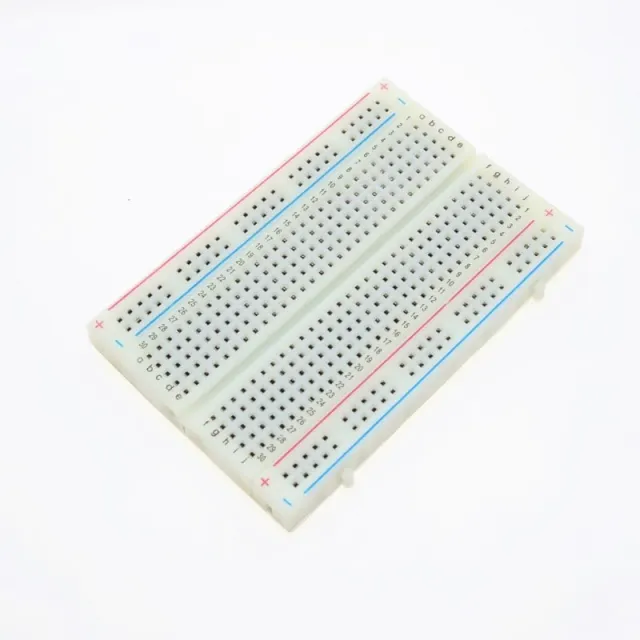
Modulen kan lödas eller användas på ett breadboard.
Spänningsområde: 0 - 5 V
Driftspänning: 3,3 - 5V
Mått: 34 x 39 x 26 mm
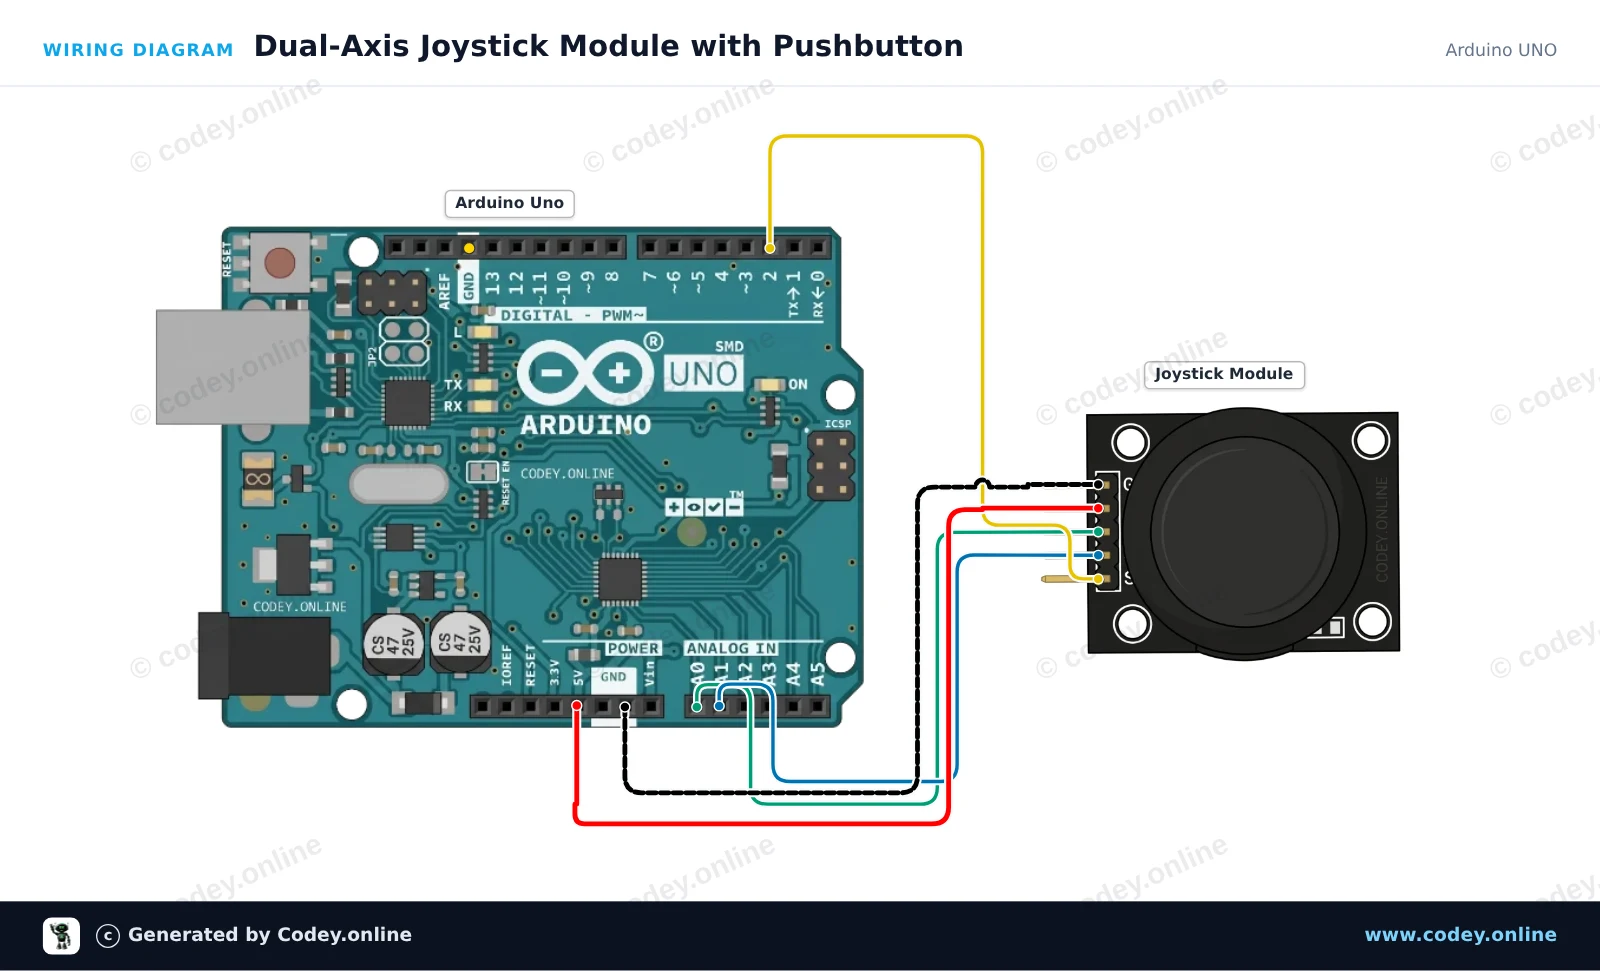
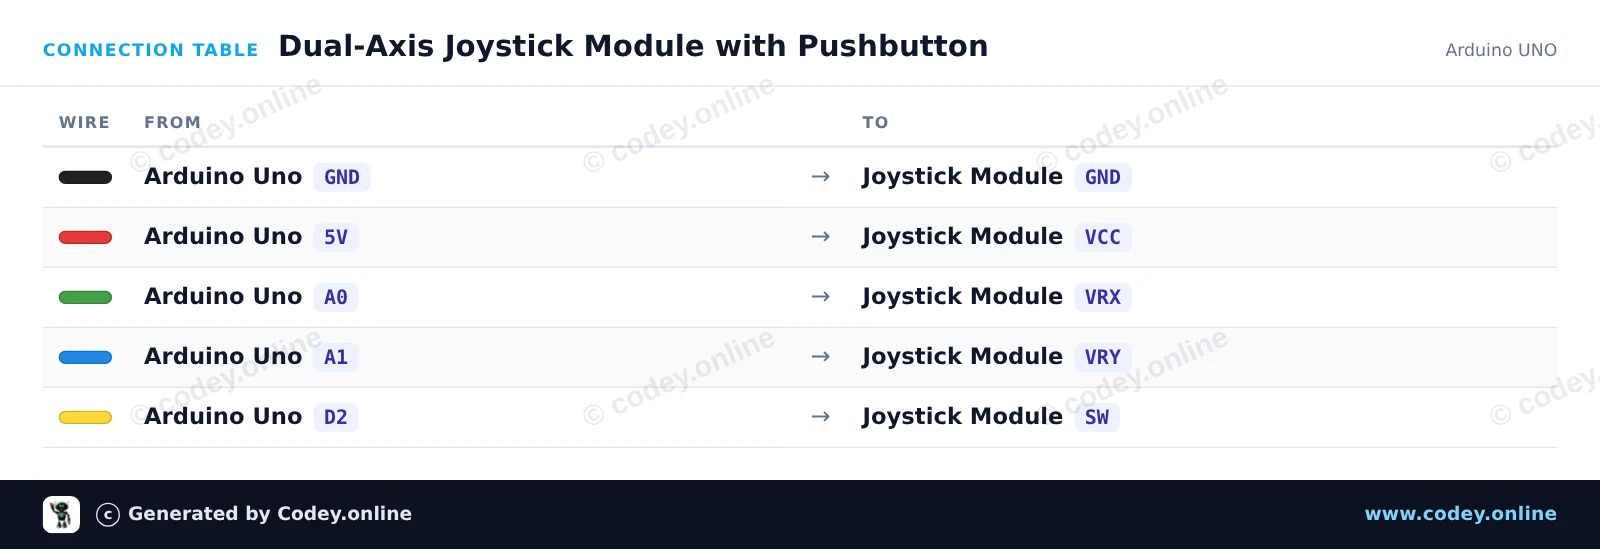
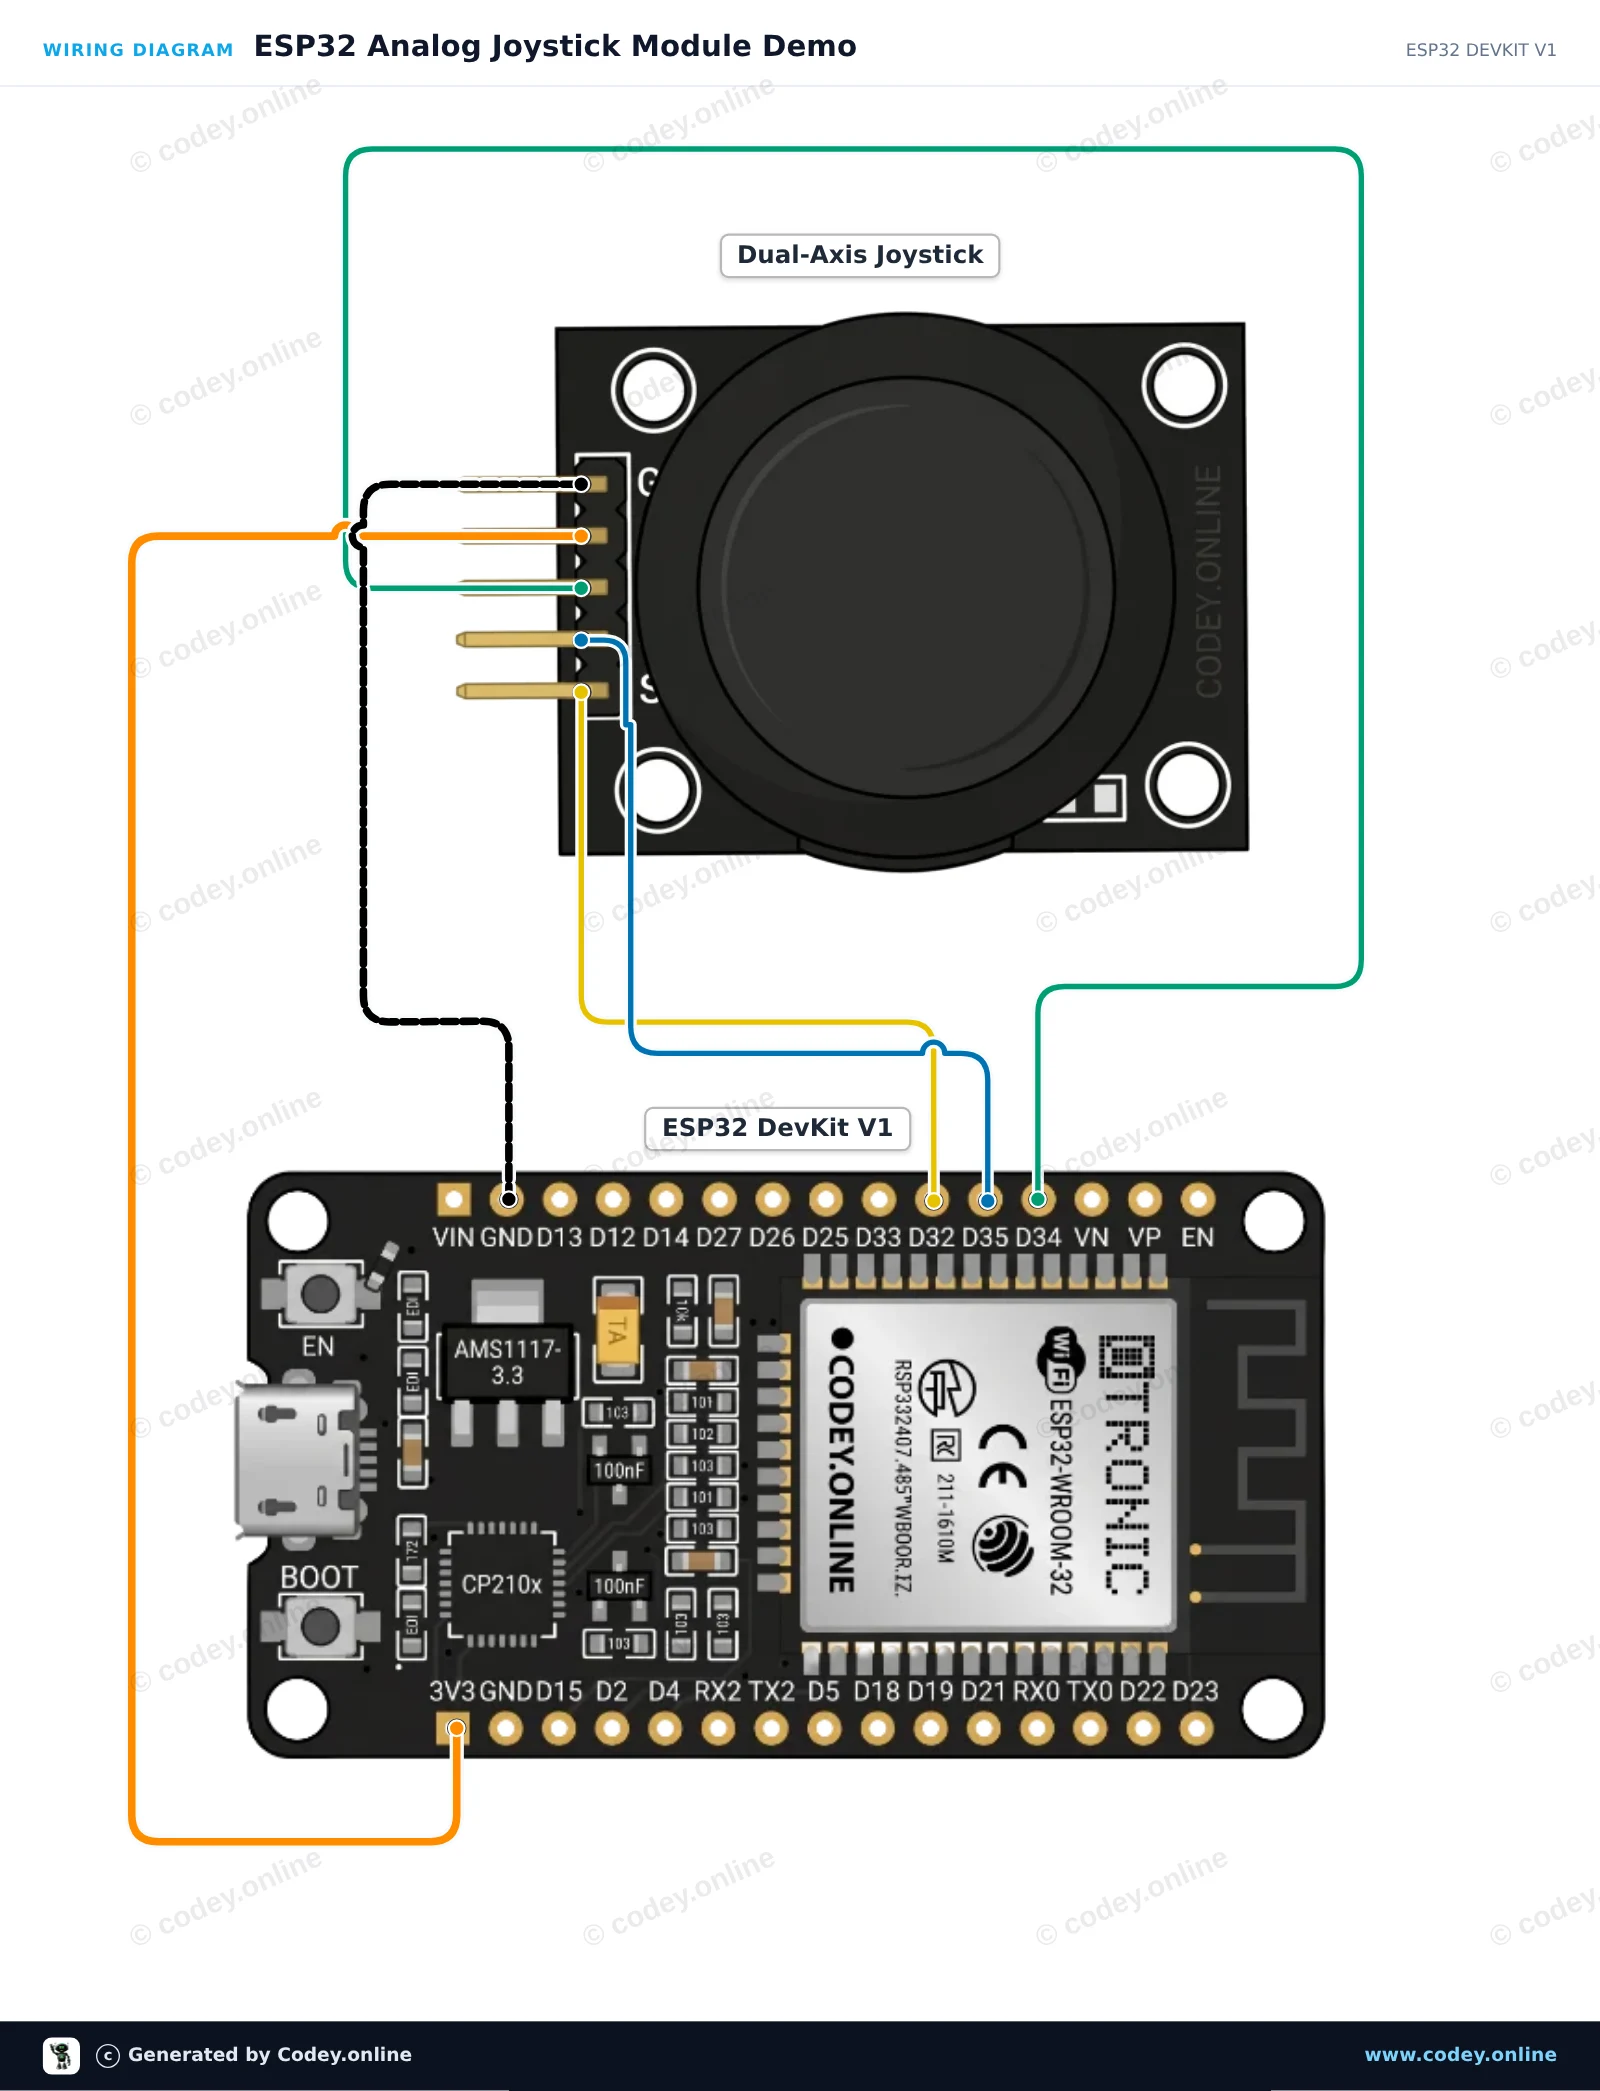
Så här kopplar du Joystickmodul till en Arduino UNO eller ESP32, med ett exempelsketch som du kan ladda upp direkt.
This example reads the analog X and Y axis positions along with the integrated pushbutton from the joystick module. Move the stick or press down on it to view real-time position values and button state in the Serial Monitor.
/*
 * ==================================================================
 *  Generated by Codey.online  —  https://www.codey.online
 * ==================================================================
 *  Project   : Dual-Axis Joystick Module with Pushbutton
 *  Board     : Arduino UNO (arduino:avr:uno)
 *  Parts     : Joystick module
 *  Libraries : none (built-in)
 *
 *  Codey Online is an AI-powered browser IDE for Arduino and ESP32.
 *  Describe your project and Codey writes the code, draws the wiring
 *  diagram and uploads it to your board, straight from the browser.
 *  This code is free to use, modify and share, without warranty.
 * ==================================================================
 */

// Pin definitions
const int PIN_X = A0;
const int PIN_Y = A1;
const int PIN_SW = 2;

void setup() {
  // Enable internal pull-up resistor for the integrated pushbutton
  pinMode(PIN_SW, INPUT_PULLUP);

  Serial.begin(115200);
  Serial.println(F("Joystick Module Demo"));
  Serial.println(F("--------------------"));
}

void loop() {
  // Read analog values for X and Y axes (range: 0 - 1023)
  int xVal = analogRead(PIN_X);
  int yVal = analogRead(PIN_Y);

  // Button is active-low (reads LOW when pressed)
  bool isPressed = (digitalRead(PIN_SW) == LOW);

  // Print the results to Serial Monitor
  Serial.print(F("X: "));
  Serial.print(xVal);
  Serial.print(F(" | Y: "));
  Serial.print(yVal);
  Serial.print(F(" | Button: "));
  Serial.println(isPressed ? F("PRESSED") : F("RELEASED"));

  delay(150);
}Wiring diagram and example code generated by Codey.online — https://www.codey.online
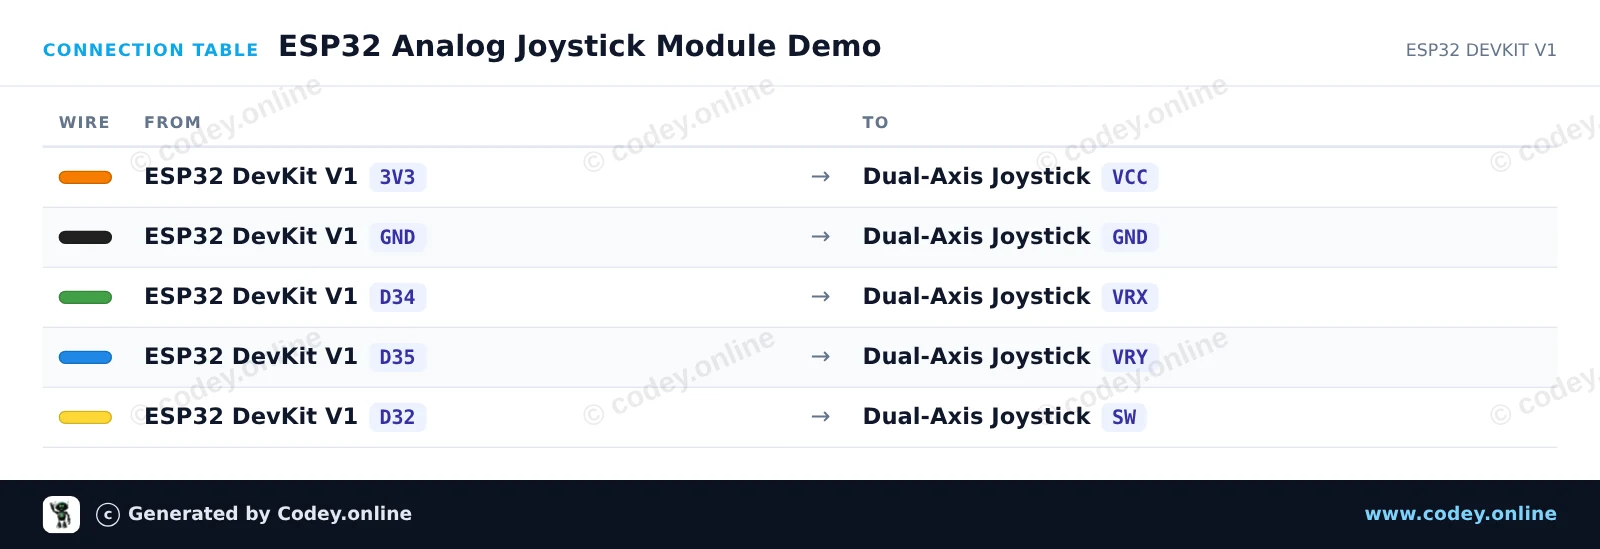
This project reads the X and Y positions as well as the integrated pushbutton state from a dual-axis analog joystick module. The ESP32 reads analog voltages via GPIO 34 and 35, and the button state via GPIO 32. Open the Serial Monitor at 115200 baud to see real-time joystick coordinates and button presses.
/*
 * ==================================================================
 *  Generated by Codey.online  —  https://www.codey.online
 * ==================================================================
 *  Project   : ESP32 Analog Joystick Module Demo
 *  Board     : ESP32 DEVKIT V1 (esp32:esp32:esp32doit-devkit-v1)
 *  Parts     : Joystick module
 *  Libraries : none (built-in)
 *
 *  Codey Online is an AI-powered browser IDE for Arduino and ESP32.
 *  Describe your project and Codey writes the code, draws the wiring
 *  diagram and uploads it to your board, straight from the browser.
 *  This code is free to use, modify and share, without warranty.
 * ==================================================================
 */

// Pin definitions (using bare GPIO numbers for ESP32)
const int pinVRX = 34;
const int pinVRY = 35;
const int pinSW  = 32;

void setup() {
  Serial.begin(115200);

  // Configure push-button pin with internal pull-up
  pinMode(pinSW, INPUT_PULLUP);
}

void loop() {
  // Read analog values from joystick potentiometers (0 - 4095 on ESP32)
  int xVal = analogRead(pinVRX);
  int yVal = analogRead(pinVRY);

  // Read digital state of the integrated switch (LOW when pressed)
  bool isPressed = (digitalRead(pinSW) == LOW);

  // Print the readings to the Serial Monitor
  Serial.print("X: ");
  Serial.print(xVal);
  Serial.print(" | Y: ");
  Serial.print(yVal);
  Serial.print(" | Button: ");
  Serial.println(isPressed ? "PRESSED" : "RELEASED");

  delay(100);
}Wiring diagram and example code generated by Codey.online — https://www.codey.online






 English
  Nederlands
  Frans
Frans  Deutsch
  Italiano
  Español
  Suomi
Suomi  Polski
  Dansk
Dansk  Ελληνικά
  Български
  Čeština
  Hrvatski
  Aileen