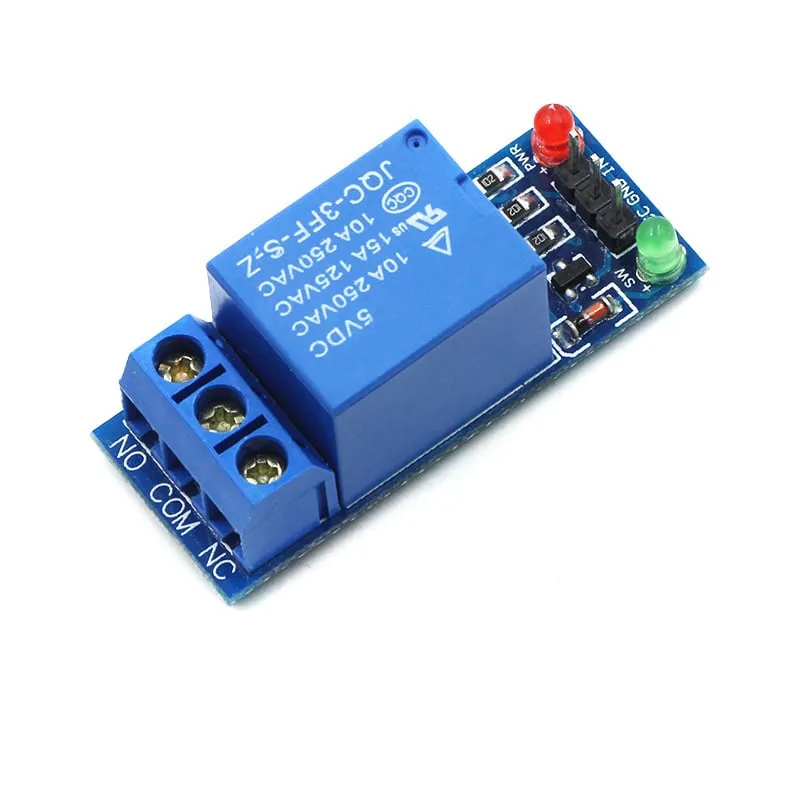
SKU: OT951-C101 Artikelnummer: XG648 EAN: 4502076751917

se här Kopplingsschema och exempelkod >>>
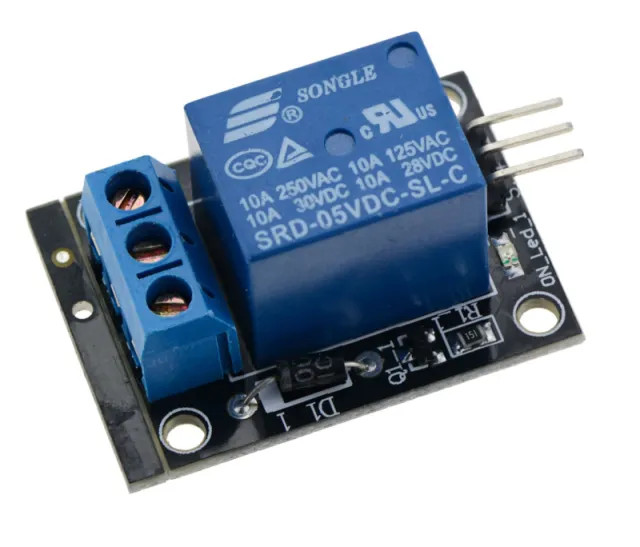
Söktermer: relä 5v, 5v relä, relay 5v, 5v relay, relä låg, relä low, relay low, blått relä, relä blått, relä 250v, relä 220v, relä 1 kanal, relä 1-kanals, relay 1 channel
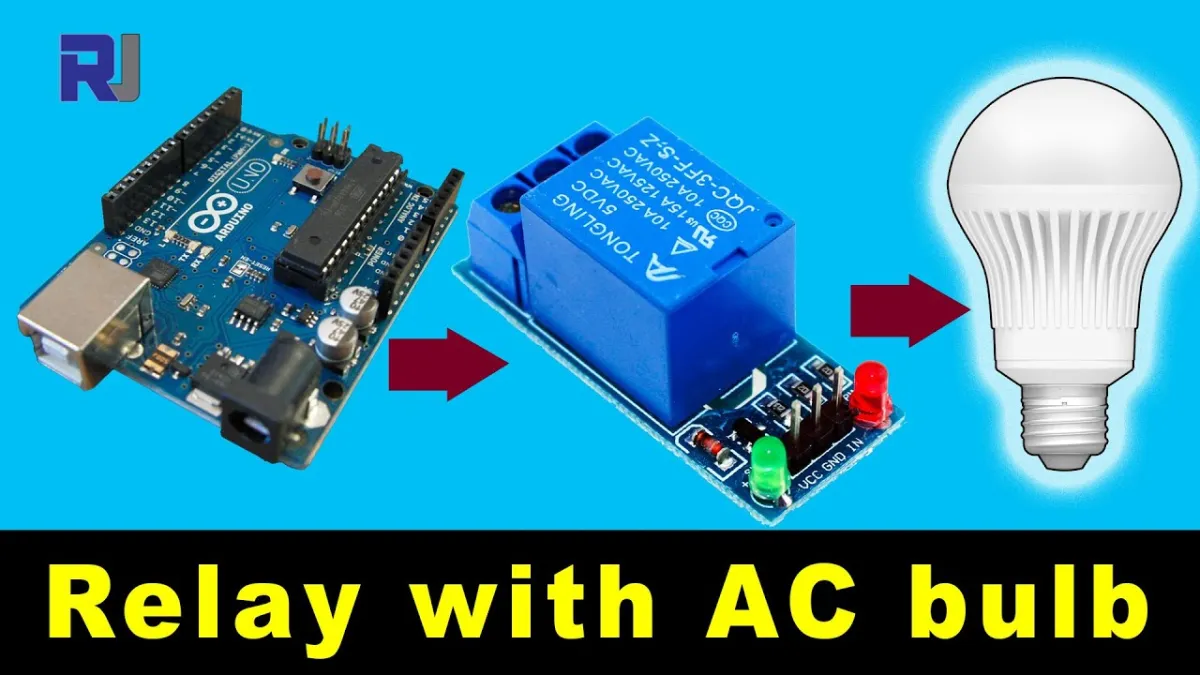
Vid uppspelning laddas videon från YouTube.
Så här kopplar du Relämodul 5v Low till en Arduino UNO eller ESP32, med ett exempelsketch som du kan ladda upp direkt.
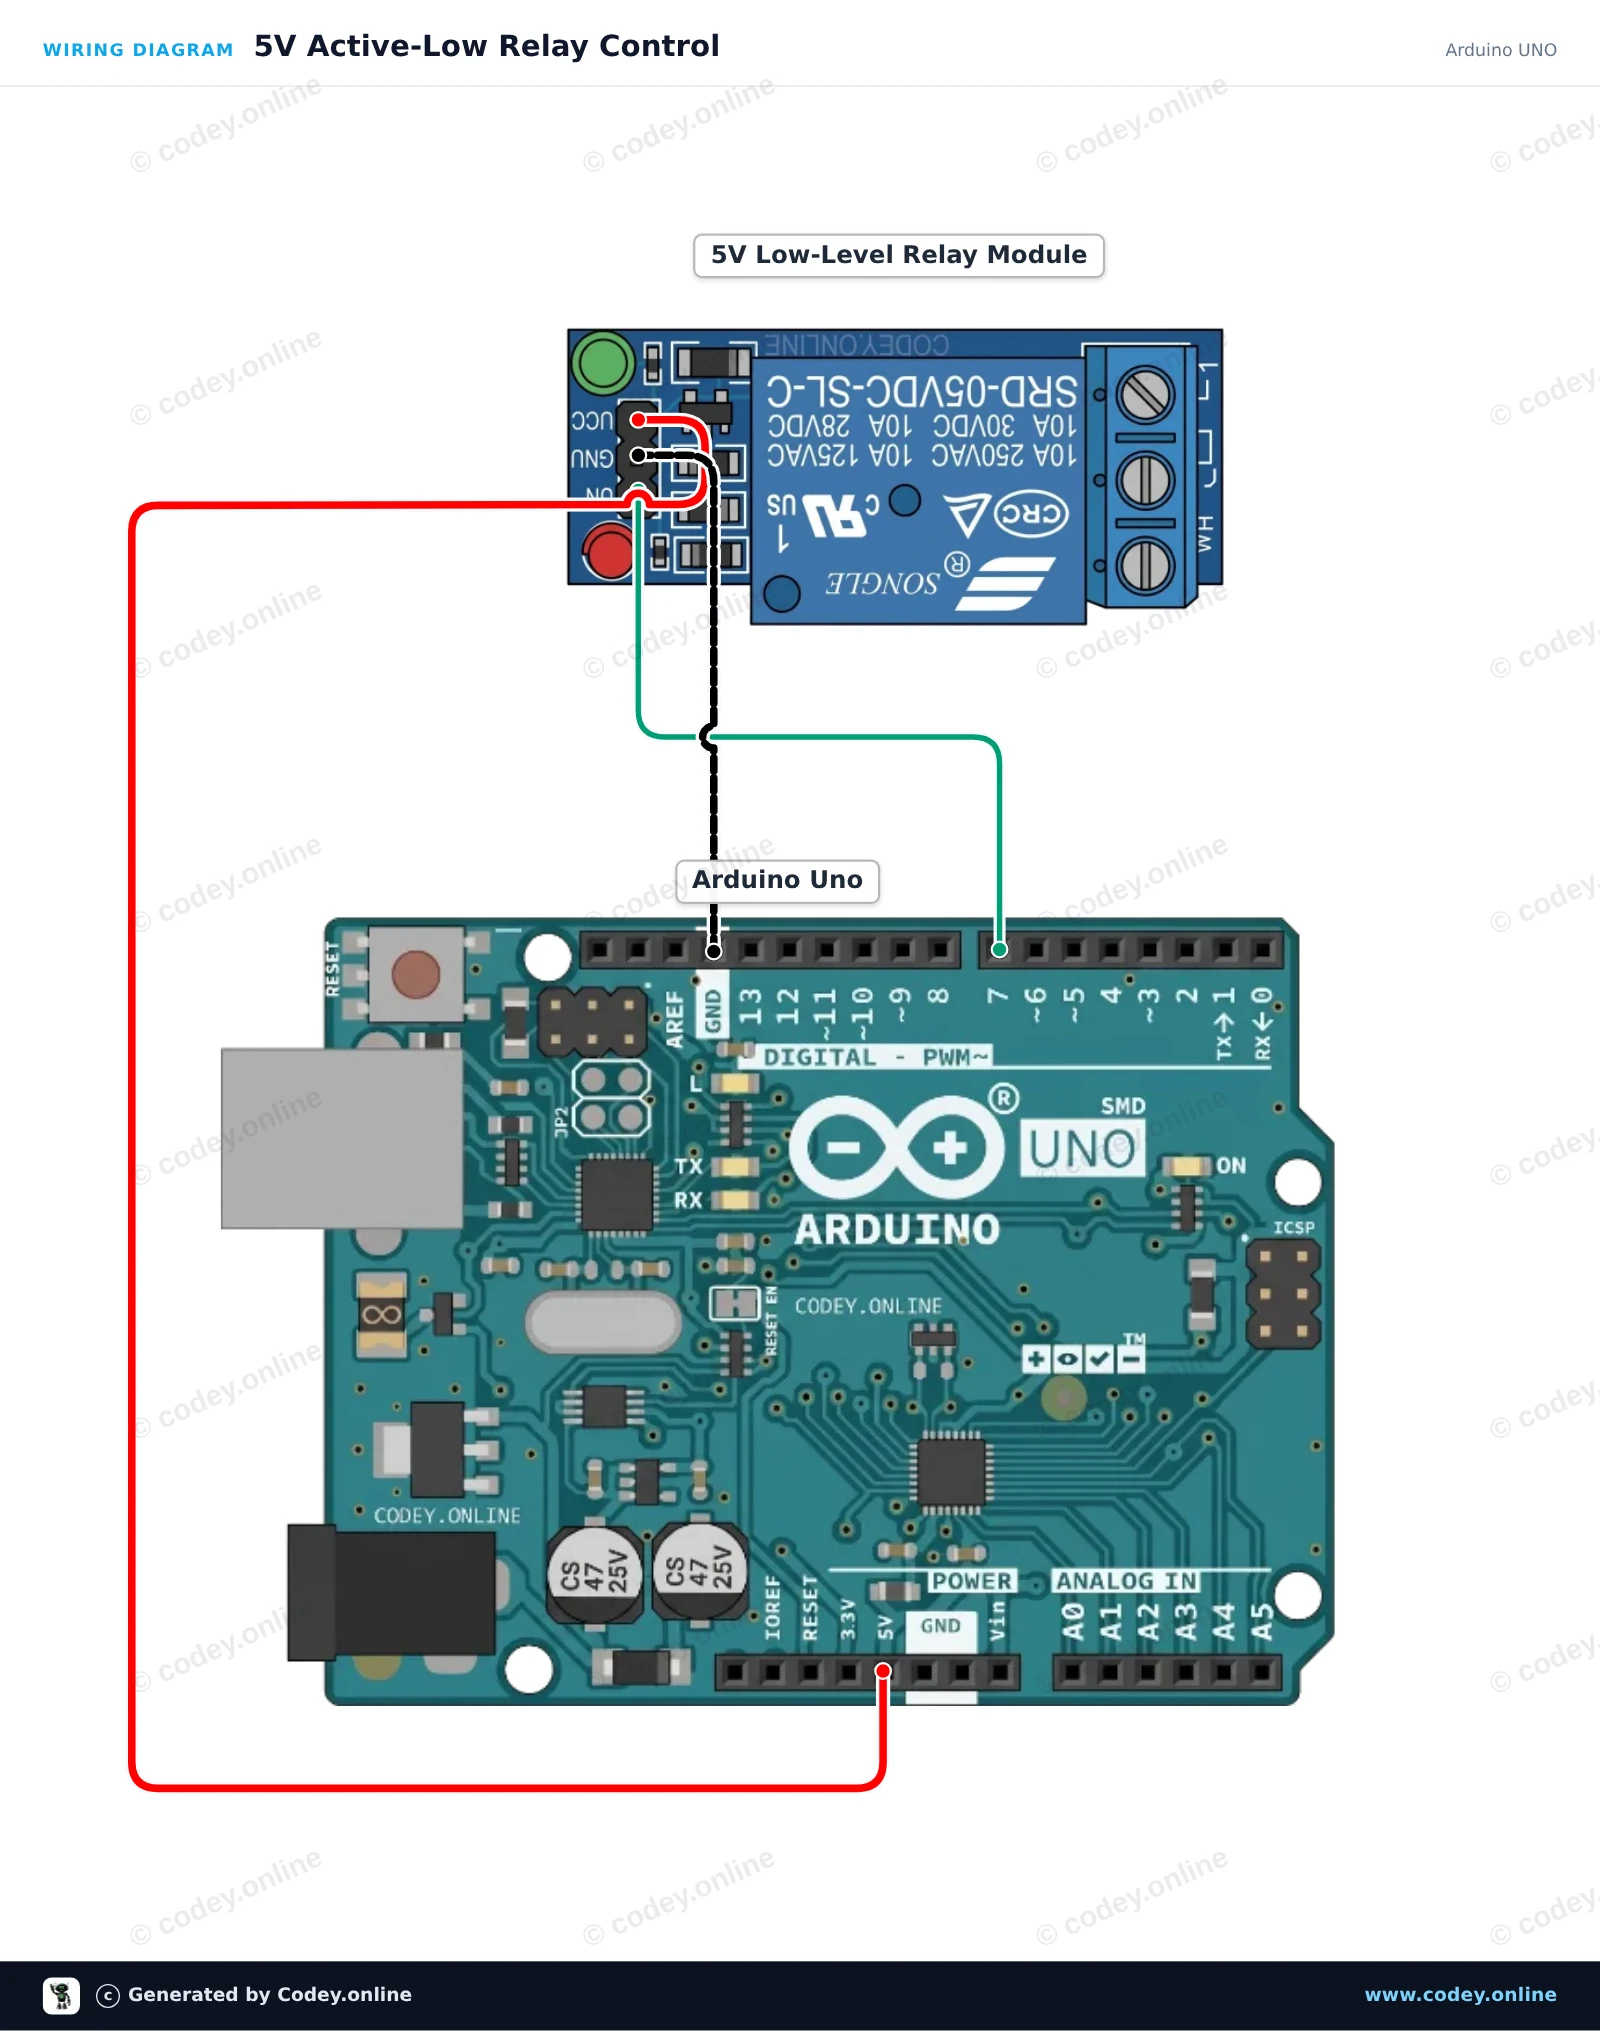
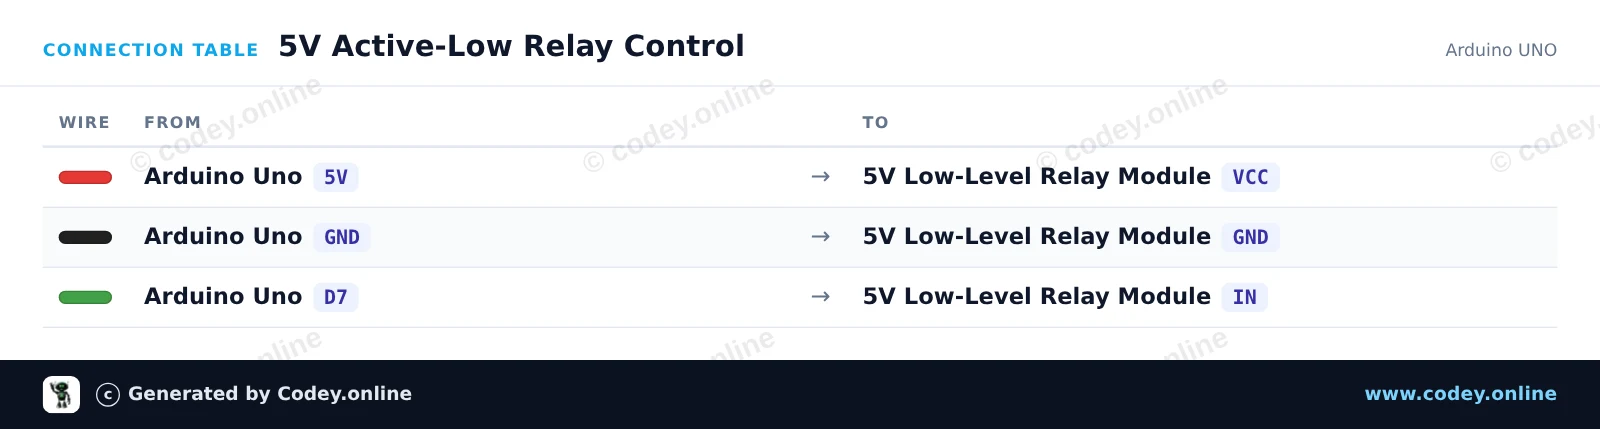
This project demonstrates how to control a 5V active-low relay module with an Arduino Uno. The sketch toggles the relay ON and OFF every two seconds while printing the current state to the Serial Monitor. Because this is an active-low module, setting the control pin LOW activates the relay, and setting it HIGH deactivates it.
/*
 * ==================================================================
 *  Generated by Codey.online  —  https://www.codey.online
 * ==================================================================
 *  Project   : 5V Active-Low Relay Control
 *  Board     : Arduino UNO (arduino:avr:uno)
 *  Parts     : Relais Module 5v Low
 *  Libraries : none (built-in)
 *
 *  Codey Online is an AI-powered browser IDE for Arduino and ESP32.
 *  Describe your project and Codey writes the code, draws the wiring
 *  diagram and uploads it to your board, straight from the browser.
 *  This code is free to use, modify and share, without warranty.
 * ==================================================================
 */

// Pin configuration
const int relayPin = 7;

void setup() {
  // Set the relay pin as output
  pinMode(relayPin, OUTPUT);

  // Active-low relay: default to OFF (HIGH state)
  digitalWrite(relayPin, HIGH);

  Serial.begin(115200);
  while (!Serial) {
    ; // Wait for serial port to connect
  }

  Serial.println(F("5V Relay Module Demo Started"));
  Serial.println(F("Relay will toggle every 2 seconds."));
}

void loop() {
  // Turn relay ON (active LOW)
  Serial.println(F("Relay: ON"));
  digitalWrite(relayPin, LOW);
  delay(2000);

  // Turn relay OFF (HIGH)
  Serial.println(F("Relay: OFF"));
  digitalWrite(relayPin, HIGH);
  delay(2000);
}Wiring diagram and example code generated by Codey.online — https://www.codey.online
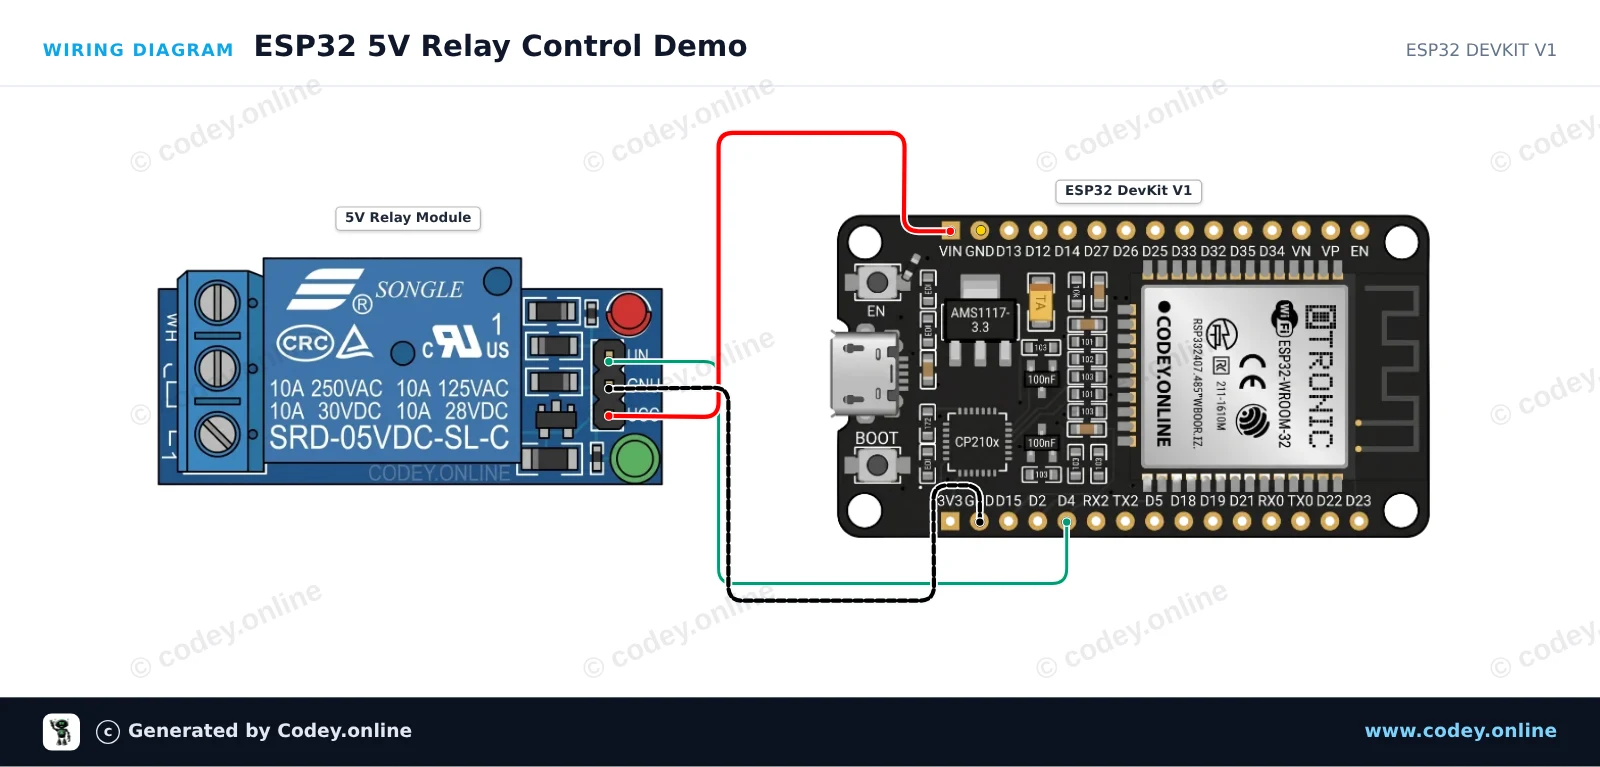
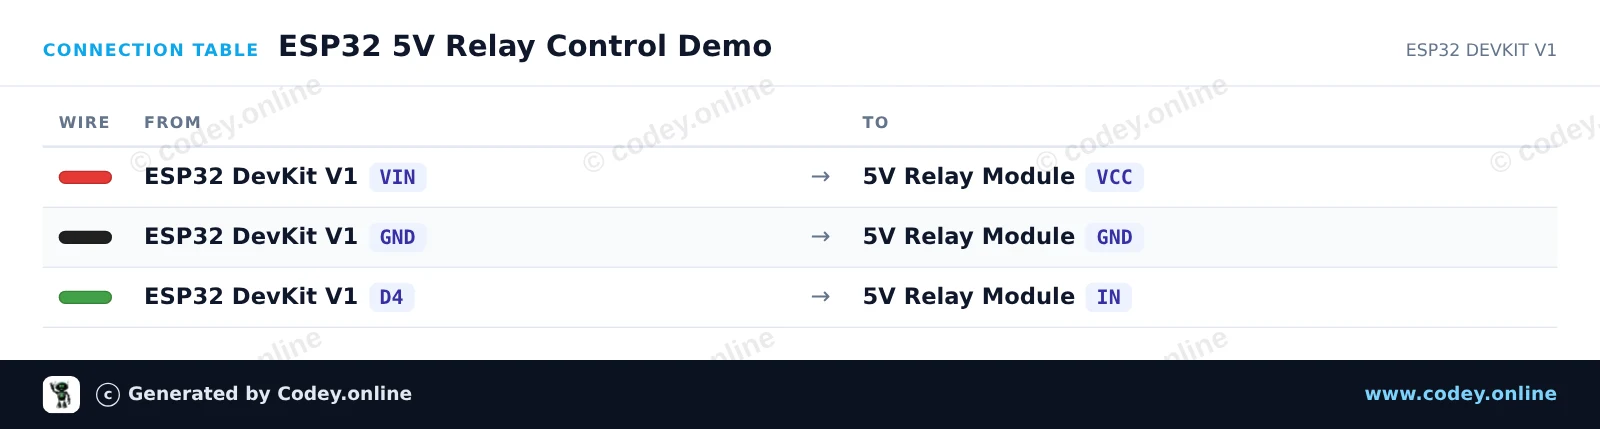
This example demonstrates how to control a 5V active-low relay module with the ESP32. The relay's coil is powered from the VIN pin (5V from USB) while GPIO 4 toggles the control pin. Driving the control pin LOW energizes the relay switch, and driving it HIGH turns it off.
/*
 * ==================================================================
 *  Generated by Codey.online  —  https://www.codey.online
 * ==================================================================
 *  Project   : ESP32 5V Relay Control Demo
 *  Board     : ESP32 DEVKIT V1 (esp32:esp32:esp32doit-devkit-v1)
 *  Parts     : Relais Module 5v Low
 *  Libraries : none (built-in)
 *
 *  Codey Online is an AI-powered browser IDE for Arduino and ESP32.
 *  Describe your project and Codey writes the code, draws the wiring
 *  diagram and uploads it to your board, straight from the browser.
 *  This code is free to use, modify and share, without warranty.
 * ==================================================================
 */

// Pin connected to relay IN
const int RELAY_PIN = 4;

void setup() {
  Serial.begin(115200);

  // Configure relay pin as output and start with relay OFF (HIGH = inactive for active-low module)
  pinMode(RELAY_PIN, OUTPUT);
  digitalWrite(RELAY_PIN, HIGH);

  Serial.println("ESP32 Relay Module Demo Initialized");
}

void loop() {
  // Turn relay ON (Active-low: LOW energizes coil)
  Serial.println("Relay: ON");
  digitalWrite(RELAY_PIN, LOW);
  delay(2000);

  // Turn relay OFF (Active-low: HIGH de-energizes coil)
  Serial.println("Relay: OFF");
  digitalWrite(RELAY_PIN, HIGH);
  delay(2000);
}Wiring diagram and example code generated by Codey.online — https://www.codey.online






 English
  Nederlands
  Frans
Frans  Deutsch
  Italiano
  Español
  Suomi
Suomi  Polski
  Dansk
Dansk  Ελληνικά
  Български
  Čeština
  Hrvatski
  Aileen