SKU: OT3513 Artikelnummer: NA463 EAN: 8720618827494

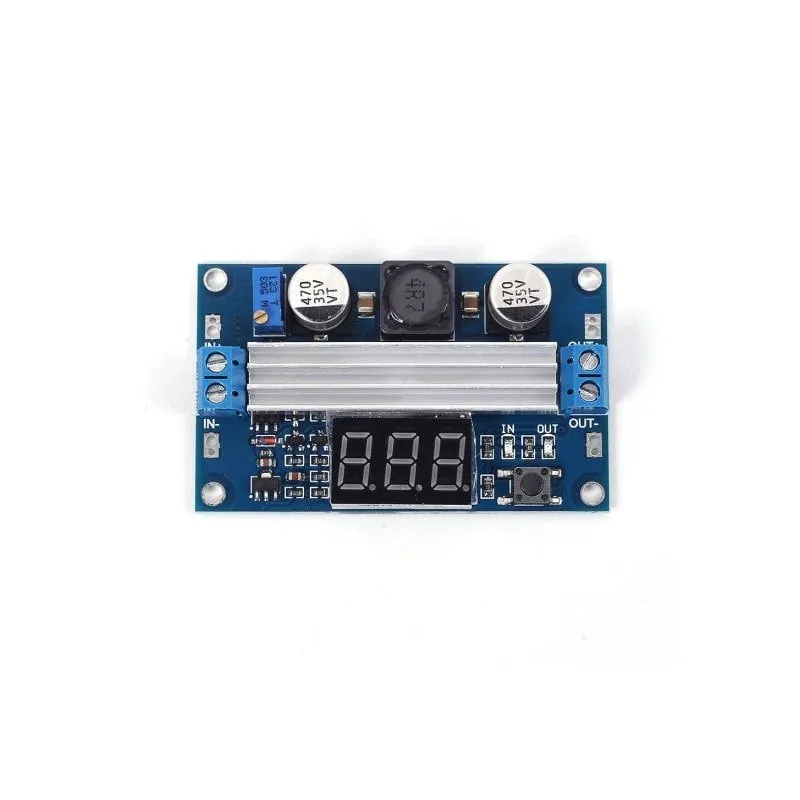
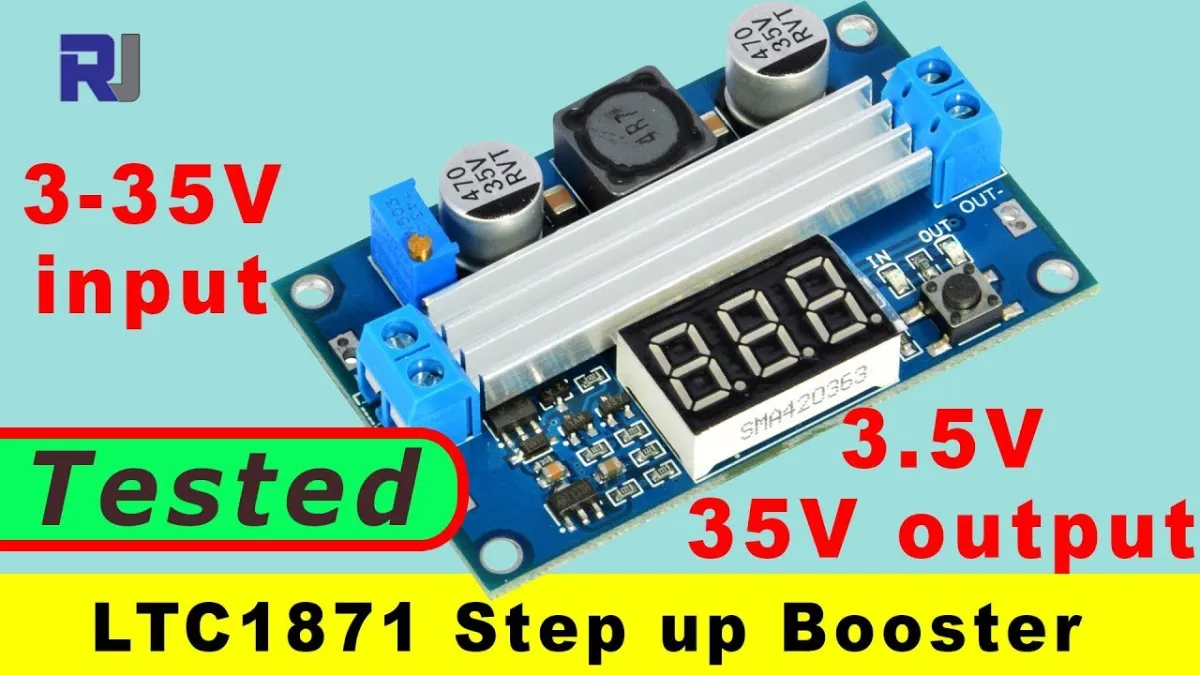
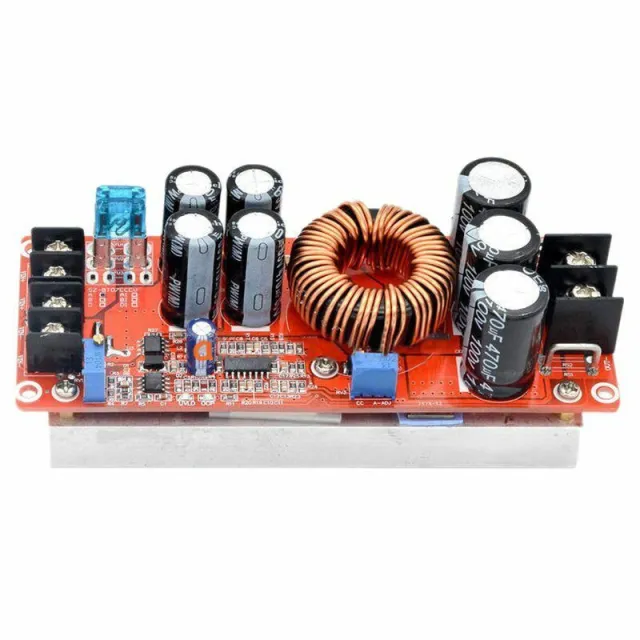
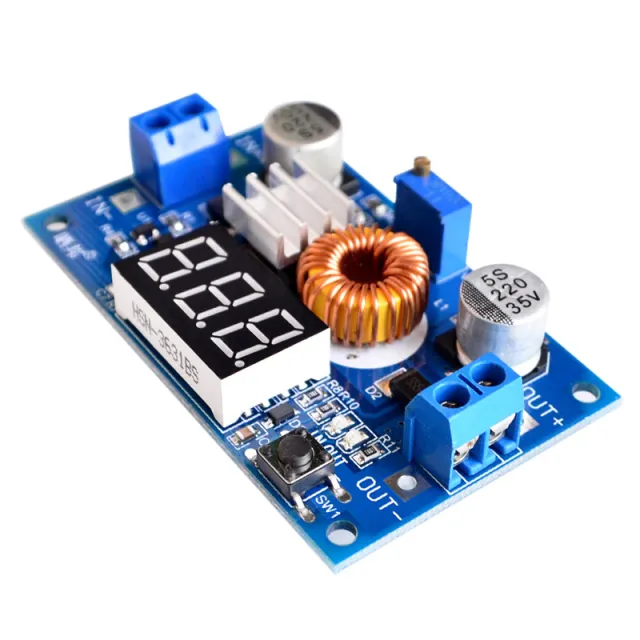
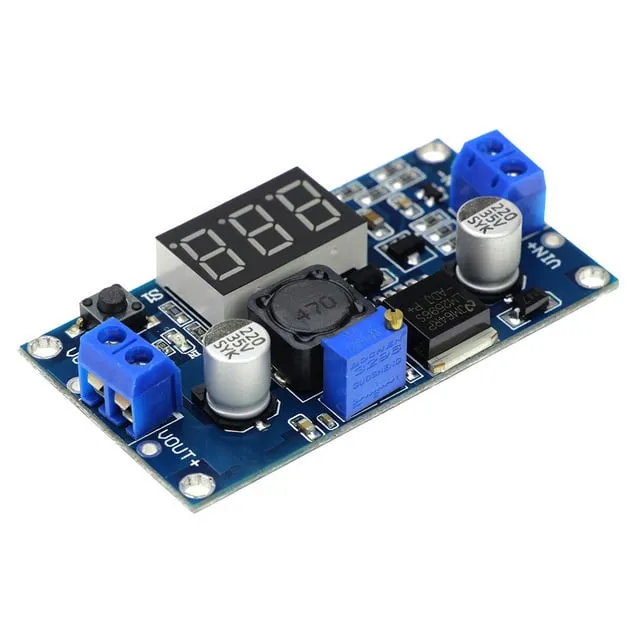
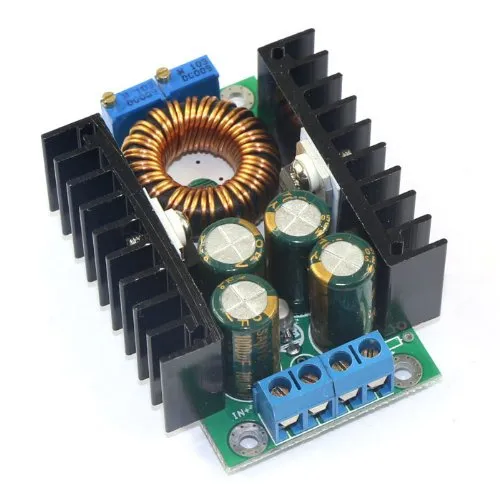
Denna Step Up (Boost) Regulator Module [3-35V] är en 6A kompakt men kraftfull DC-DC step-up (boost) spänningsomvandlarmodul.
Har ett brett arbetsområde för matningsspänning med en ingångsspänning mellan 3,5 och 35V och höjer denna ingångsspänning från 4V till 35V.
Modulen innehåller också en integrerad voltmeter som kan mäta både ingångs- och utgångsspänningarna. En spänningsväljarknapp gör det enkelt att växla mellan de två.
Tillsammans med den högprecisa flervarvs potentiometern kan varje önskad utgångsspänning inom dess arbetsområde uppnås och mätas utan att en extern testmätare behövs. Dessutom visar LED-indikatorer ström- och in- eller utgångsmätningen.
Funktioner
Paketet innehåller:
1 x DC-DC kraftfull justerbar step-up-modul
Vid uppspelning laddas videon från YouTube.
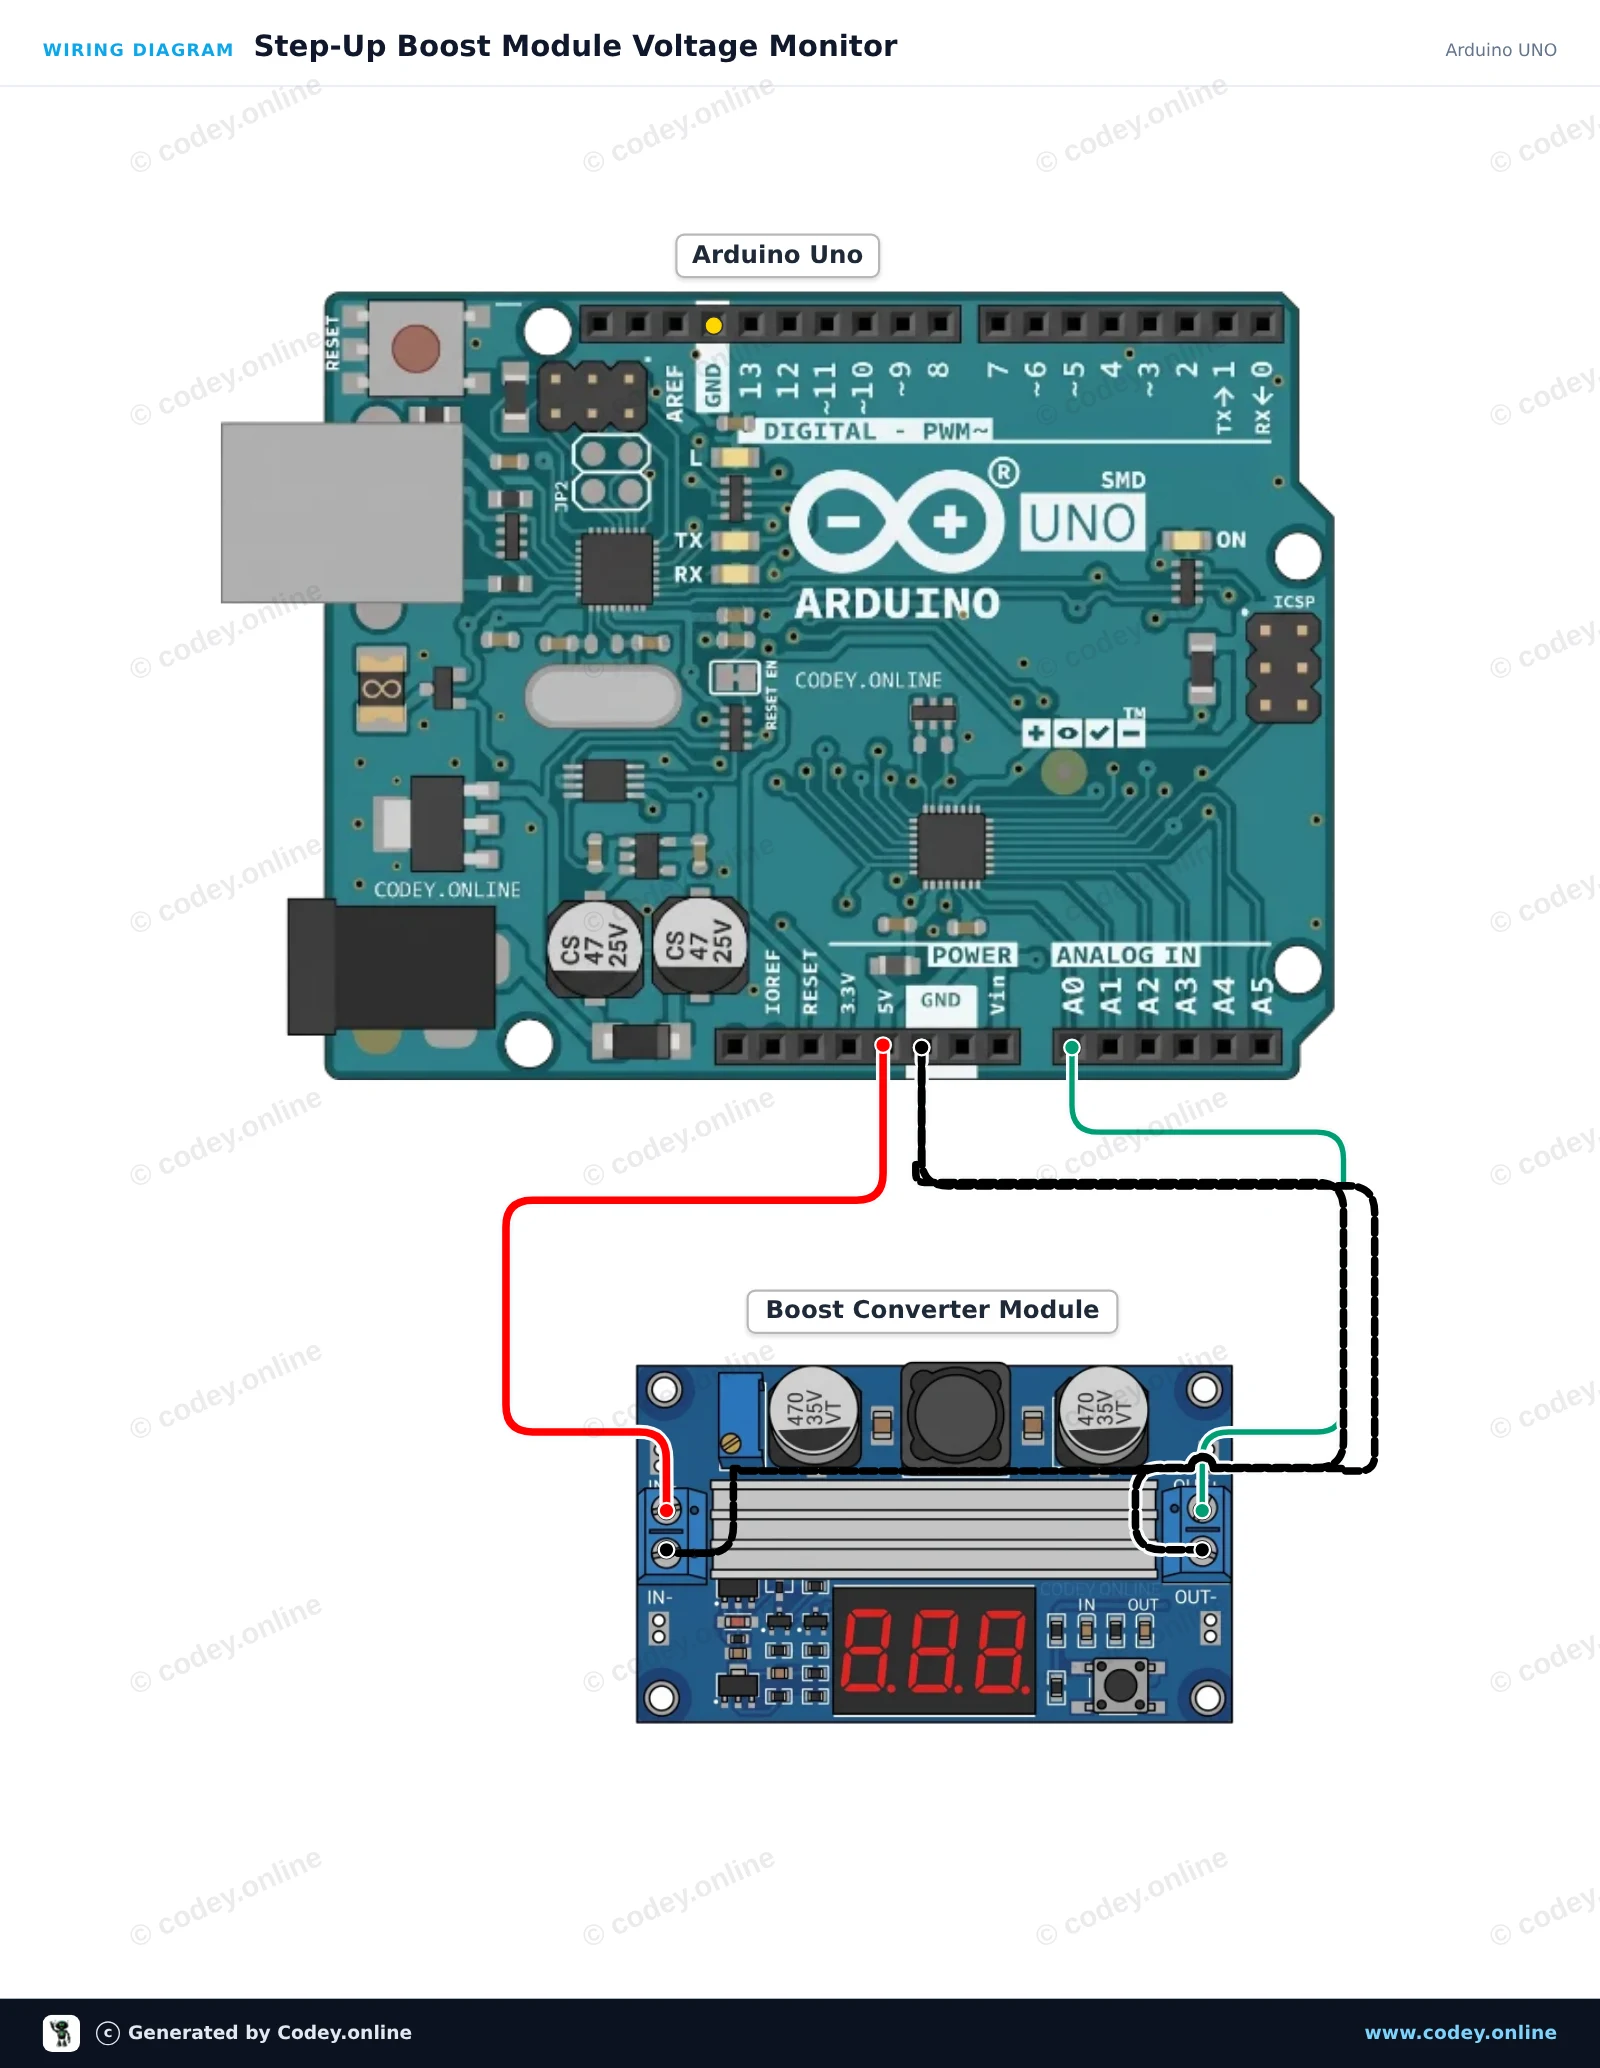
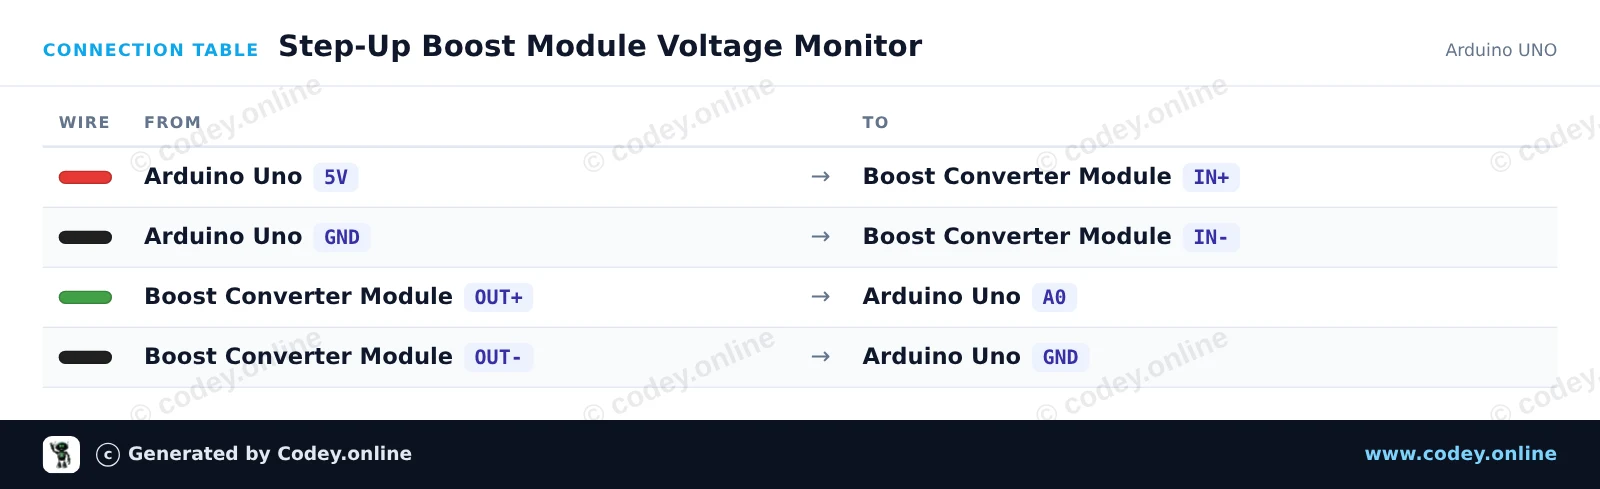
Så här kopplar du DC-DC High Power Adjustable Step-up Module 3.0~35V to 3.5~35V 100W with Digital Display Voltmeter till en Arduino UNO eller ESP32, med ett exempelsketch som du kan ladda upp direkt.
This project powers the adjustable DC-DC step-up module from the Arduino's 5V pin and monitors the output voltage using analog pin A0. You can compare the Arduino's Serial Monitor readings with the module's onboard LED display as you turn the potentiometer.
/*
 * ==================================================================
 *  Generated by Codey.online  —  https://www.codey.online
 * ==================================================================
 *  Project   : Step-Up Boost Module Voltage Monitor
 *  Board     : Arduino UNO (arduino:avr:uno)
 *  Parts     : DC-DC High Power Adjustable Step-up Module 3.0~35V to 3.5~35V 100W with Digital Display Voltmeter
 *  Libraries : none (built-in)
 *
 *  Codey Online is an AI-powered browser IDE for Arduino and ESP32.
 *  Describe your project and Codey writes the code, draws the wiring
 *  diagram and uploads it to your board, straight from the browser.
 *  This code is free to use, modify and share, without warranty.
 * ==================================================================
 */

// DC-DC Boost Module Voltage Monitor

const int voltagePin = A0;

void setup() {
  Serial.begin(115200);
  Serial.println(F("DC-DC Boost Module Voltage Monitor Initialized"));
}

void loop() {
  int rawValue = analogRead(voltagePin);
  float voltage = rawValue * (5.0 / 1023.0);

  Serial.print(F("Raw ADC: "));
  Serial.print(rawValue);
  Serial.print(F(" | Module Voltage: "));
  Serial.print(voltage, 2);
  Serial.println(F(" V"));

  delay(1000);
}Wiring diagram and example code generated by Codey.online — https://www.codey.online
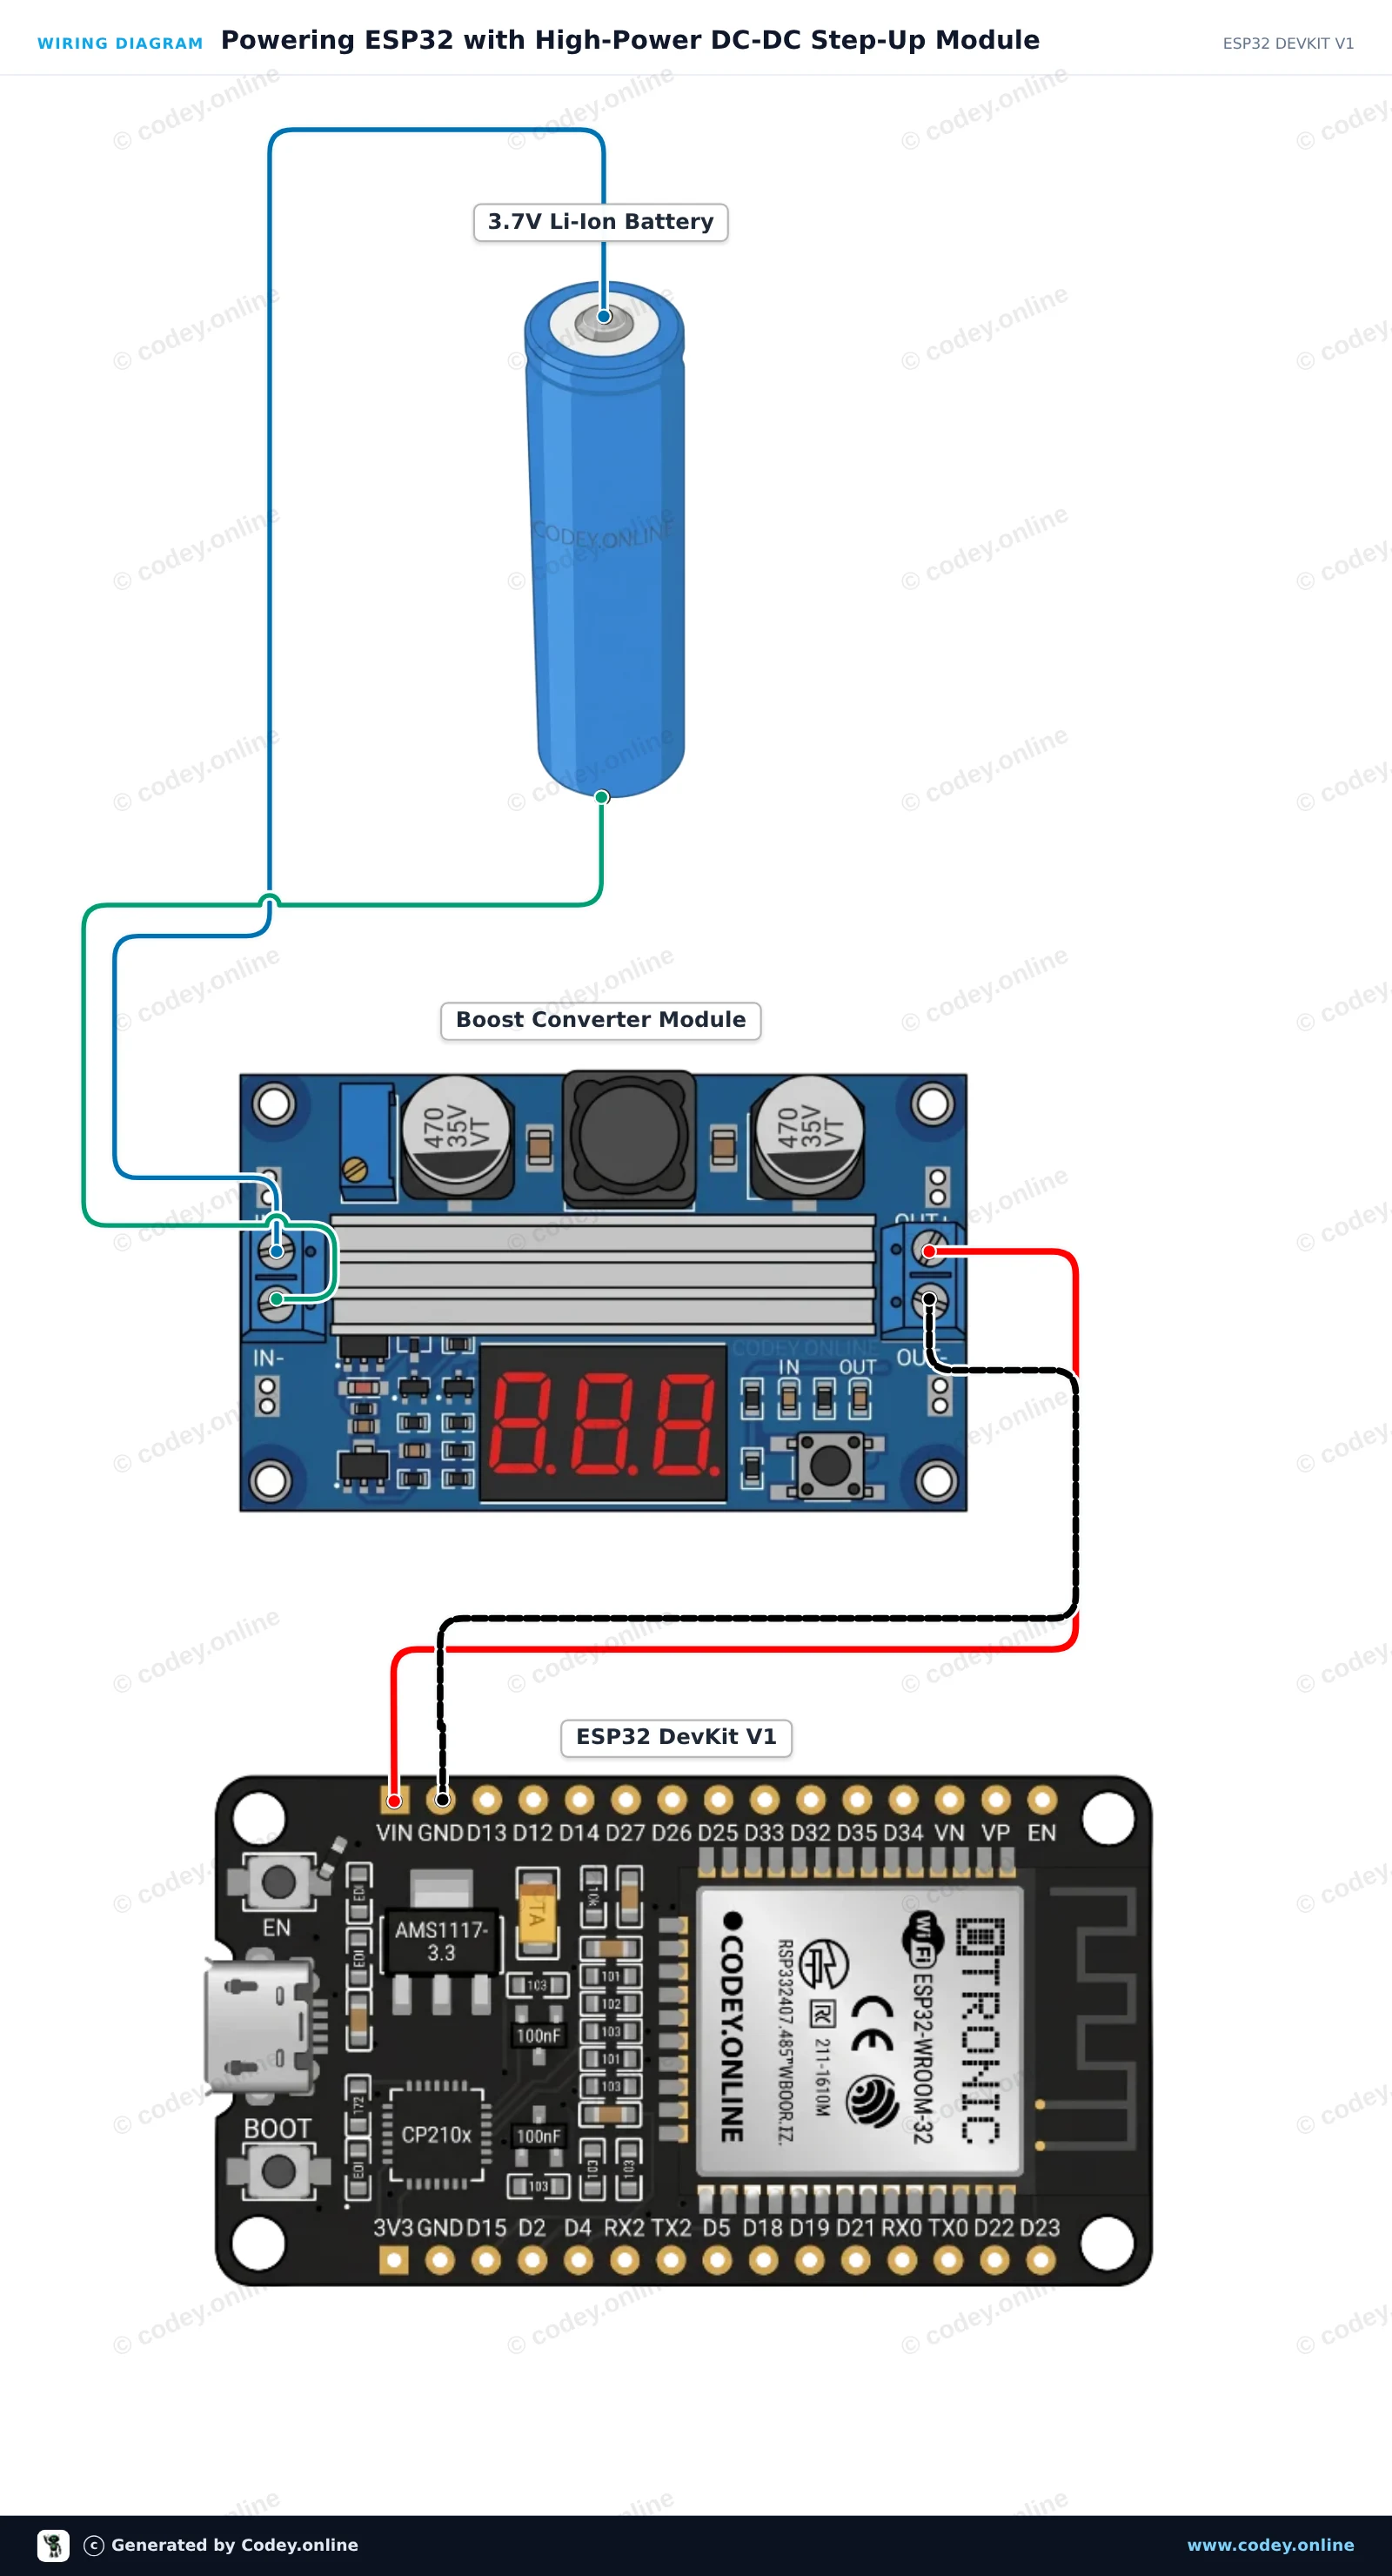
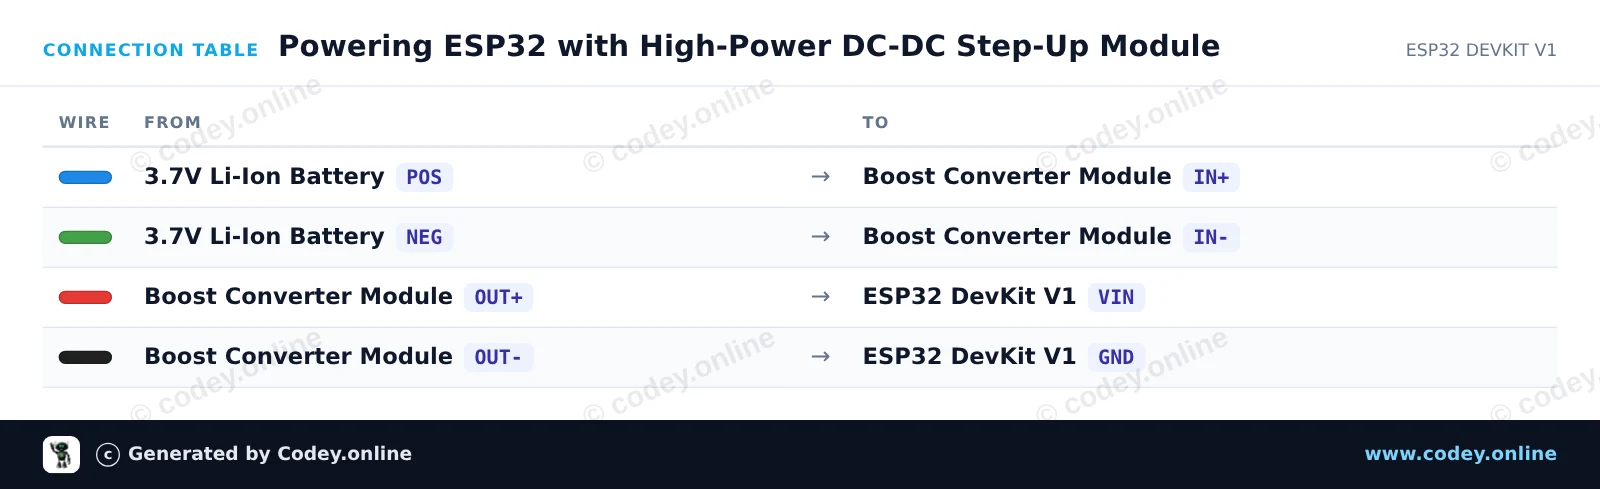
This project demonstrates powering an ESP32 board from a 3.7V Li-ion battery boosted to 5V using the adjustable DC-DC step-up module with built-in voltmeter display. Adjust the onboard potentiometer until the display shows 5.0V before connecting to the ESP32 VIN pin. Once powered, the ESP32 blinks its onboard LED and prints status messages to the Serial Monitor.
/*
 * ==================================================================
 *  Generated by Codey.online  —  https://www.codey.online
 * ==================================================================
 *  Project   : Powering ESP32 with High-Power DC-DC Step-Up Module
 *  Board     : ESP32 DEVKIT V1 (esp32:esp32:esp32doit-devkit-v1)
 *  Parts     : DC-DC High Power Adjustable Step-up Module 3.0~35V to 3.5~35V 100W with Digital Display Voltmeter
 *  Libraries : none (built-in)
 *
 *  Codey Online is an AI-powered browser IDE for Arduino and ESP32.
 *  Describe your project and Codey writes the code, draws the wiring
 *  diagram and uploads it to your board, straight from the browser.
 *  This code is free to use, modify and share, without warranty.
 * ==================================================================
 */

// Demonstration of ESP32 powered via DC-DC Step-Up Module
// Ensure output voltage is set to 5.0V using the onboard trimmer before connecting.

const int LED_PIN = 2; // Onboard LED on ESP32 DevKit V1
int uptimeSeconds = 0;

void setup() {
  Serial.begin(115200);
  delay(1000);

  pinMode(LED_PIN, OUTPUT);

  Serial.println("========================================");
  Serial.println("ESP32 Powered by DC-DC Boost Converter");
  Serial.println("========================================");
}

void loop() {
  // Turn on LED
  digitalWrite(LED_PIN, HIGH);
  delay(500);

  // Turn off LED
  digitalWrite(LED_PIN, LOW);
  delay(500);

  uptimeSeconds++;
  Serial.print("System running on boosted power. Uptime: ");
  Serial.print(uptimeSeconds);
  Serial.println(" s");
}Wiring diagram and example code generated by Codey.online — https://www.codey.online





 English
  Nederlands
  Frans
Frans  Deutsch
  Italiano
  Español
  Suomi
Suomi  Polski
  Dansk
Dansk  Ελληνικά
  Български
  Čeština
  Hrvatski
  Aileen